1. The Comments are a versatile tool, as they can be customized to which screens and documents they are displayed and which users can view and edit them. The comments themselves can be fully customized.
This article explains how to set up Comment types in "Manage Comment Type". These can be applied at three levels: Contact, Transaction and Stock. A comment is always assigned to a Comment Type. The settings from the Comment Type determine the settings of the assigned Comment.
A Preset Comment can also be created in the "Manage Comment Type" setting. It is a saved comment that is attached to a Comment Type. This is an efficient way to avoid the user inputting the same comment multiple times.
TIP! Only a "General Manager" user type can access Comment Types.
2. Navigate to the main menu and click "Settings"
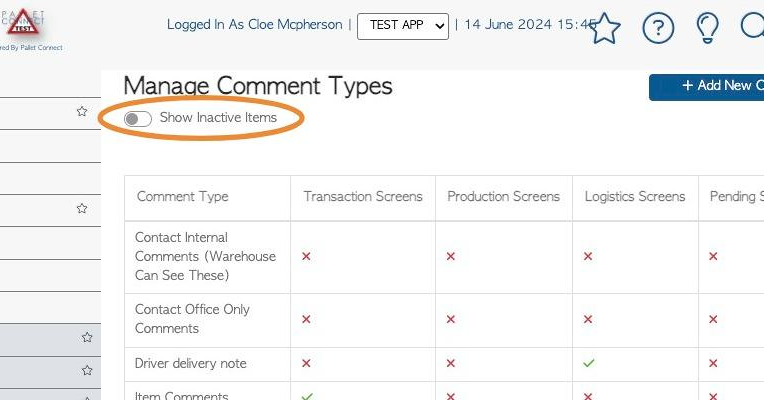
3. Click "Manage Comment Types"

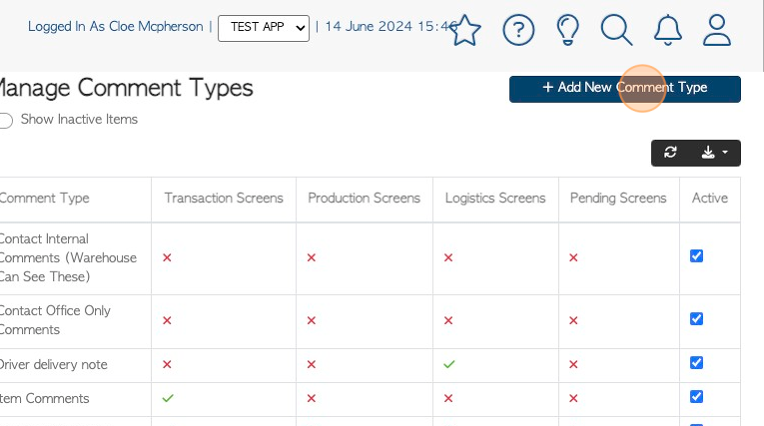
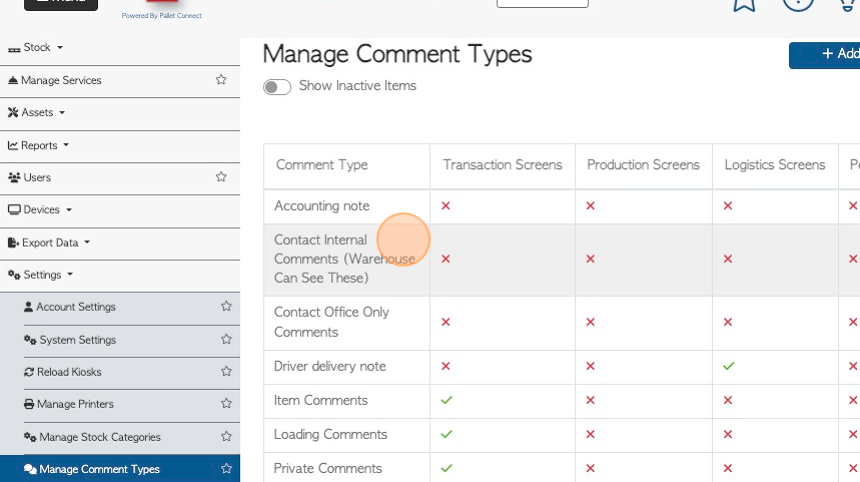
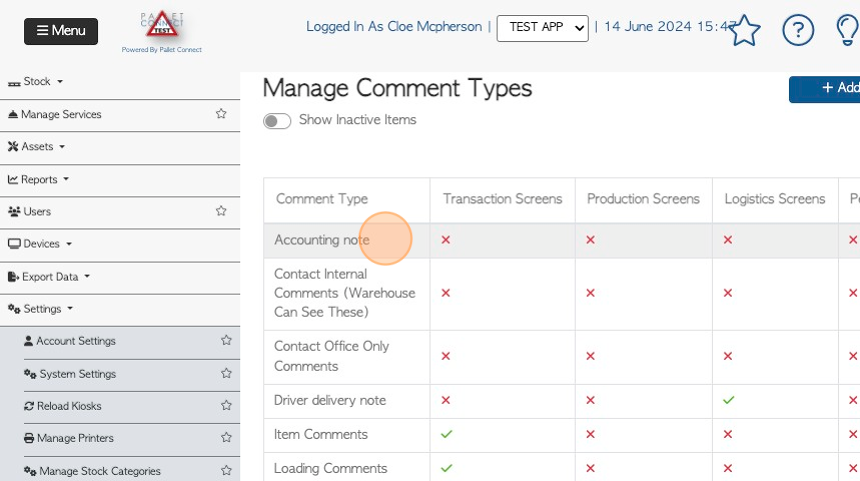
4. The page shows a list of active Comment Types and gives an overview of settings. Use the toggle button to view Inactive items.
5. TO ADD COMMENT TYPE: Click "Add New Comment Type"
6. Click the "Comment Type" field to name the comment type.
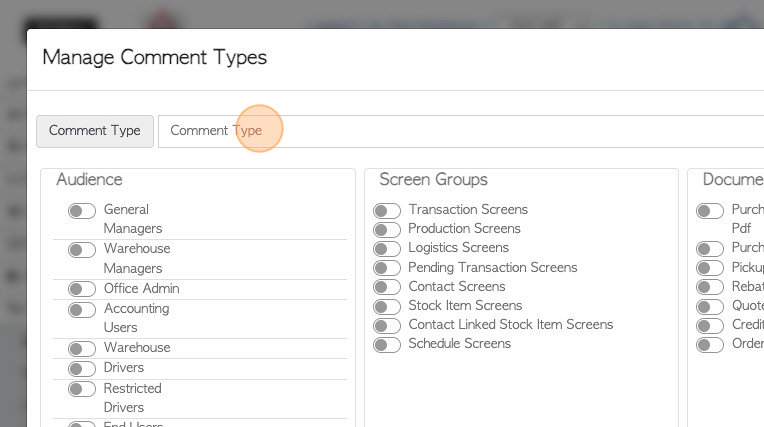
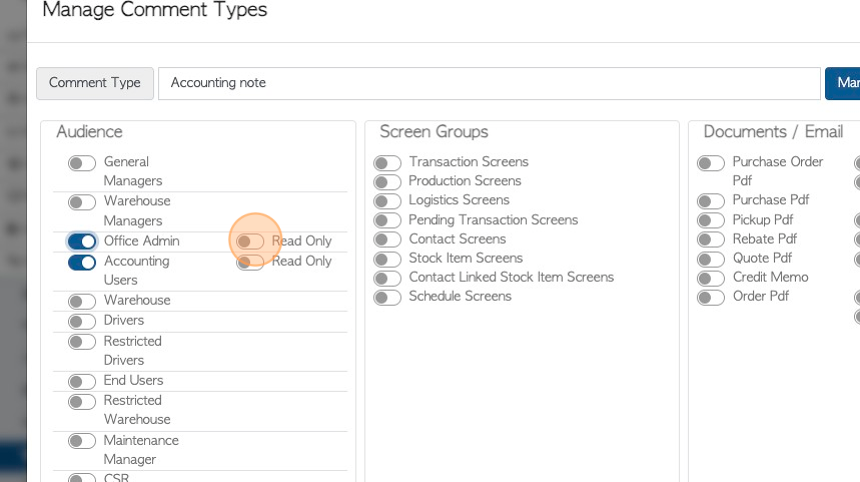
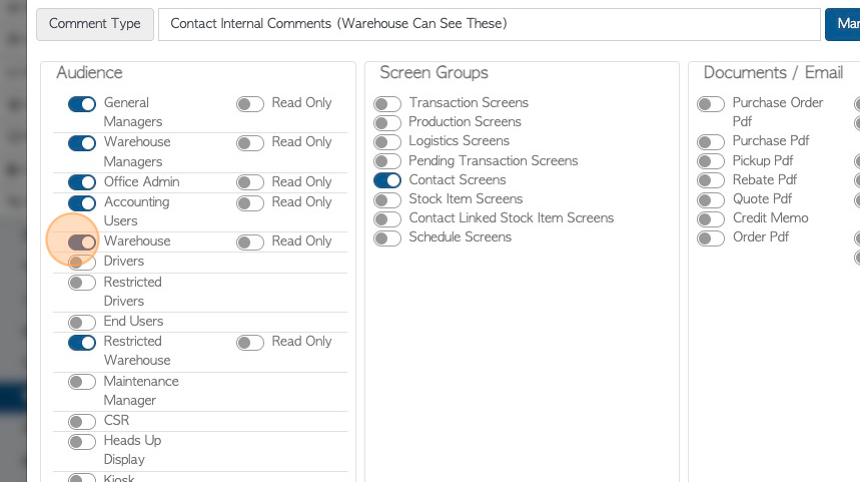
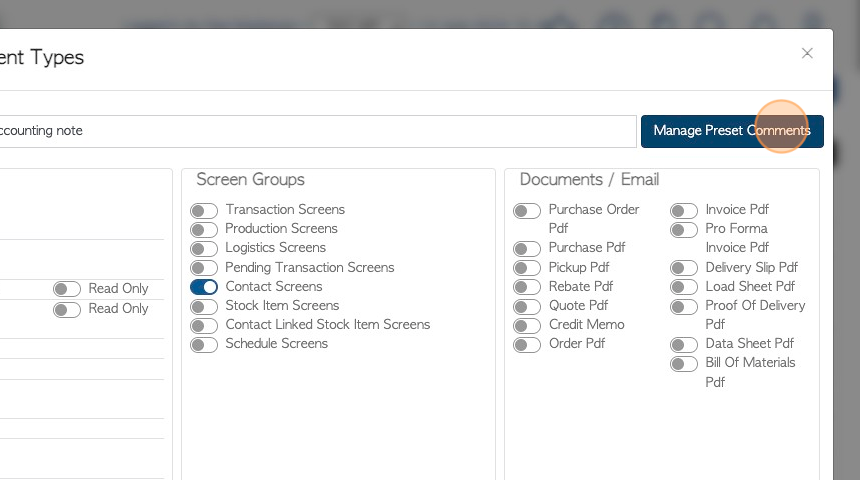
7. Click on the group/user type that will be able to edit the comment.
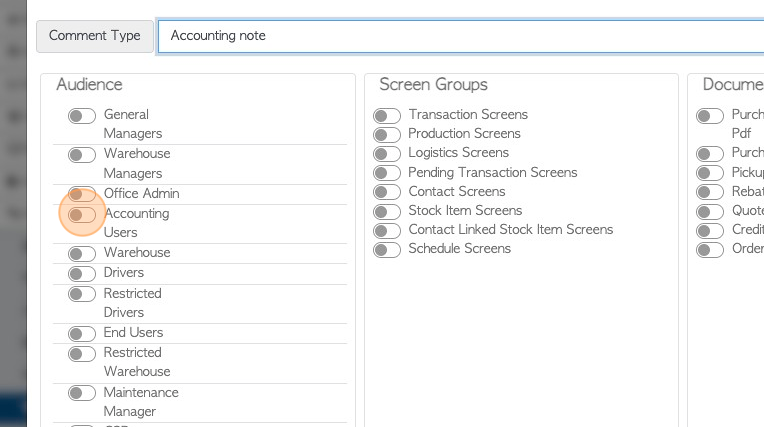
8. In the Audience column, click "Read Only" if the group cannot edit the Comment type, just view.
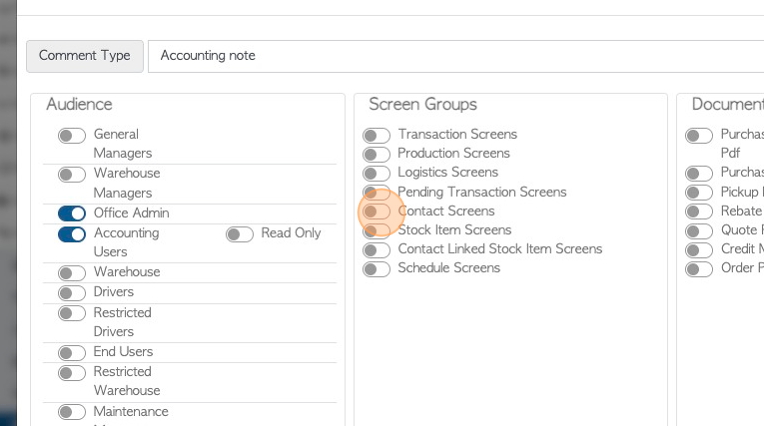
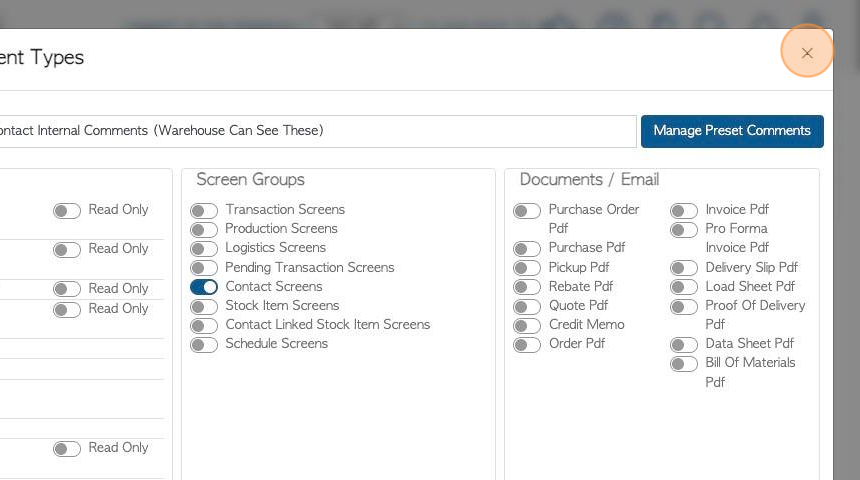
9. Click on the Pallet Connect screens where the comment type will be available.
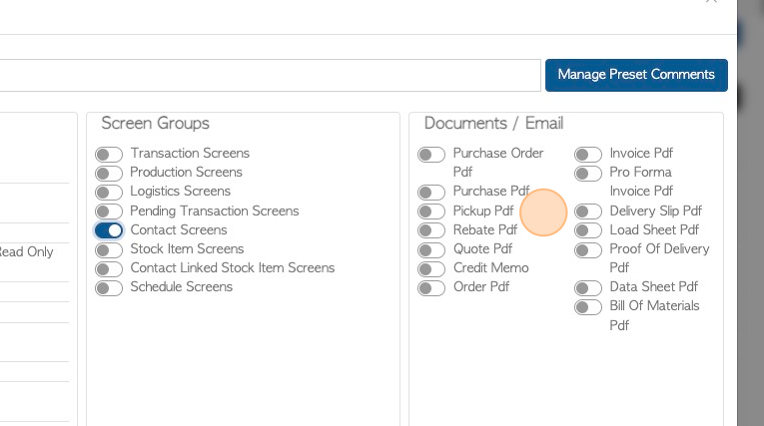
10. Click on the documents/emails where the comment will be visible.
11. Click "Save" to complete.

12. The comment type will now show in the list.

13. TO EDIT COMMENT TYPE: Click on the selected Comment Type from the list.
14. Click on the toggle buttons to edit the existing settings.
15. Each setting will automatically save, once clicked. Click "Save" and exit.
16. TO ADD/EDIT PRESET COMMENTS : Click on the selected Comment Type, from the list.
17. Click "Manage Preset Comments"
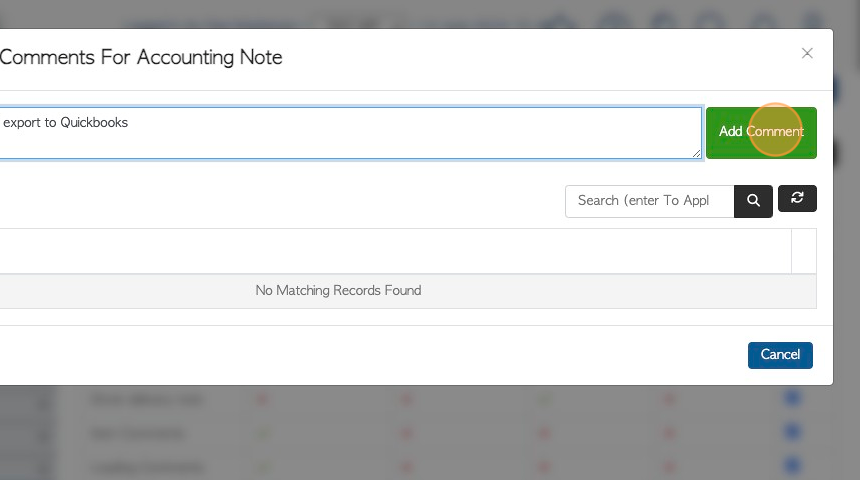
18. Click the "Comment" field to add the Preset Comment.

19. Click "Add Comment" to save
20. Click here to edit the existing comments
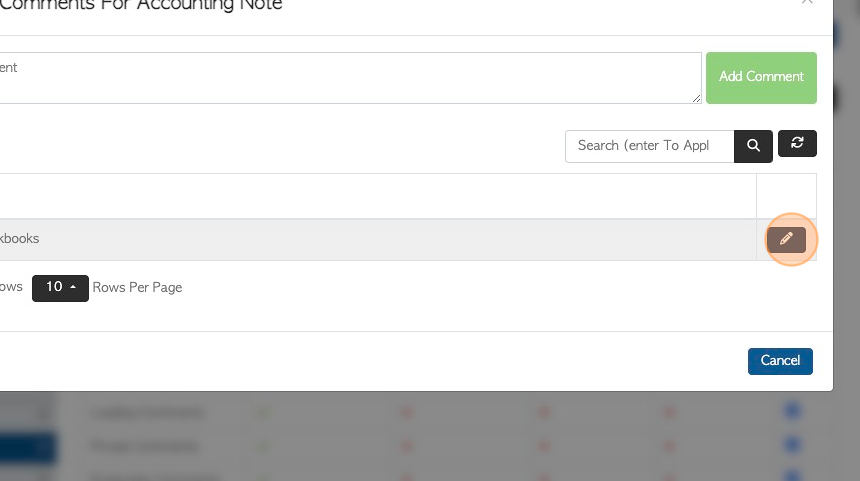
21. Click "Save Comment" to complete. The Preset Comment is now linked to the Comment Type.
