1. The Tag feature in Pallet Connect is customizable, so it can be used to categorize transactions in a variety of ways.
The Tags are colour coded and named and currently can be assigned to a transaction. They are a beneficial visual aid and can be utilized to further filter reports.
This article explains how to create a new Tag.
TIP! The General Manager user group can create and manage Tags.
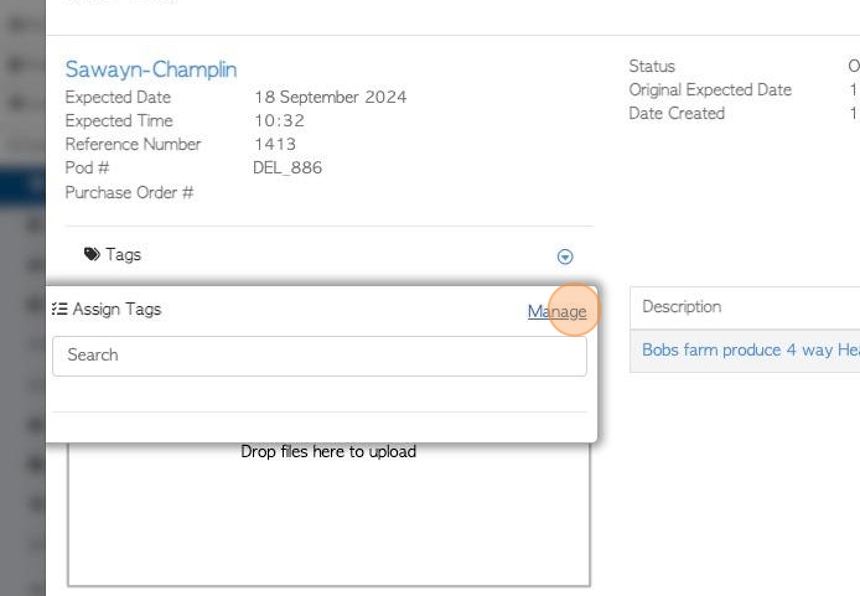
2. Navigate to the transaction.
Find the transaction, either through the main menu, by typing the reference number into the global search or from the contact's profile.
Tags can be created from an Order, Vendor Request, Supplier Purchase or Affiliate Linked transaction. This article uses a selected Customer Order.
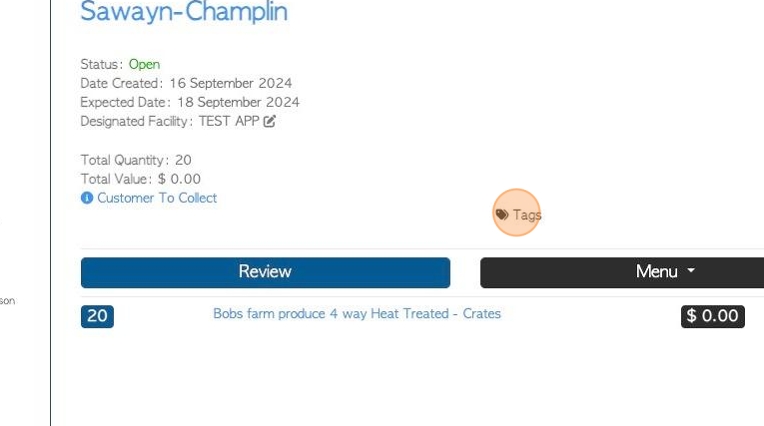
3. Click "Tags" from the slide out summary page, or click on "Review" to see transaction details.
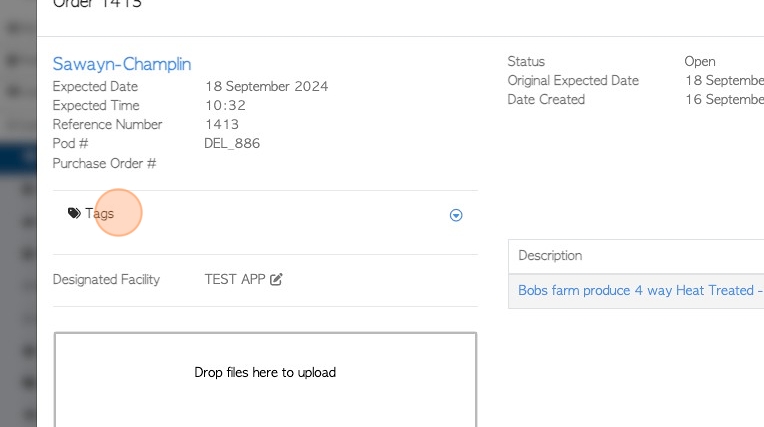
4. Click "Tags" from the transaction details screen.
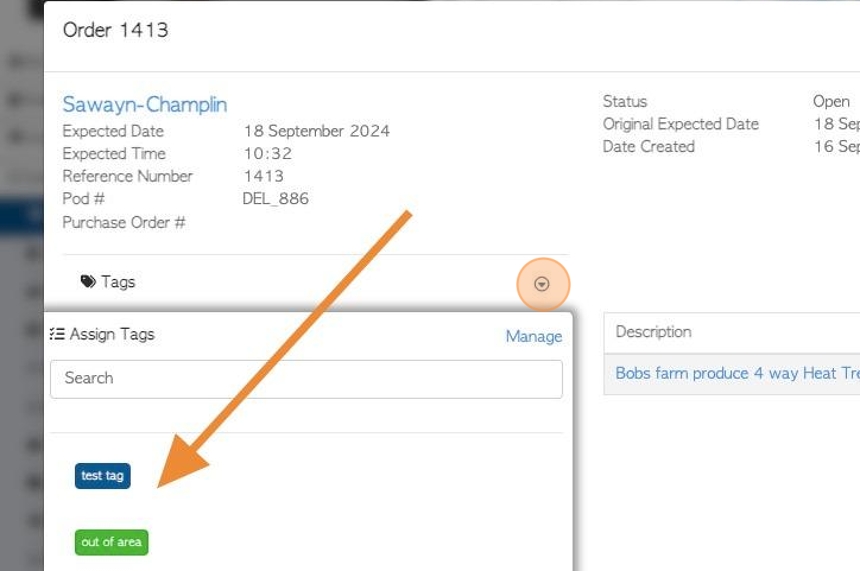
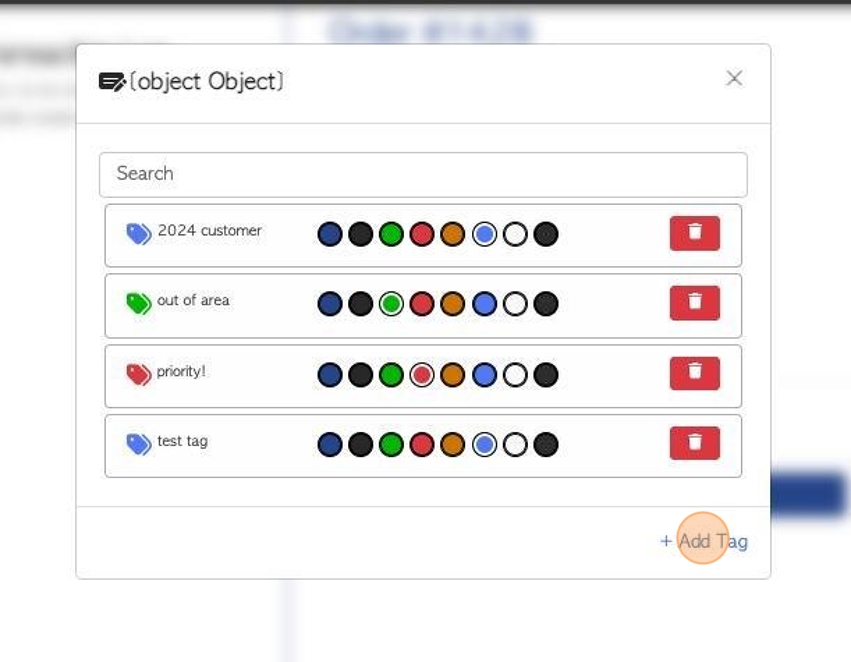
5. Click here to reach the drop down menu of existing Tags.

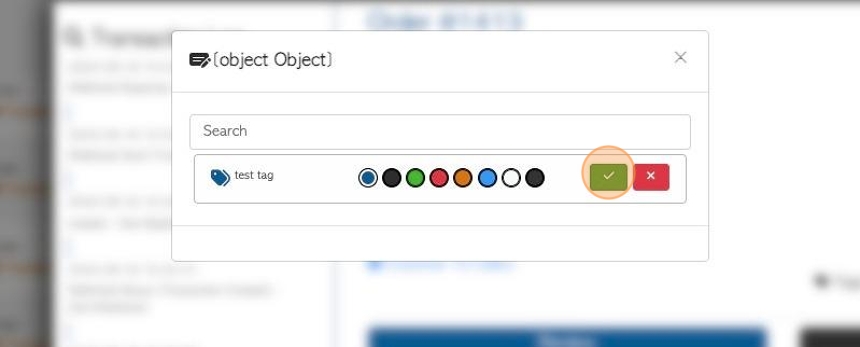
6. Click the "Manage" button.
7. Click the "Add Tag" button.
8. Click this text field to name the Tag.
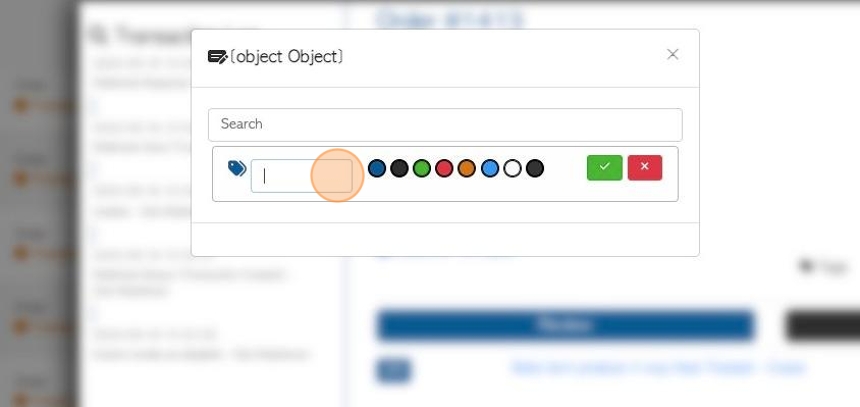
9. Click here to select the colour of the Tag.
TIP! A colour can be used for more than one Tag.
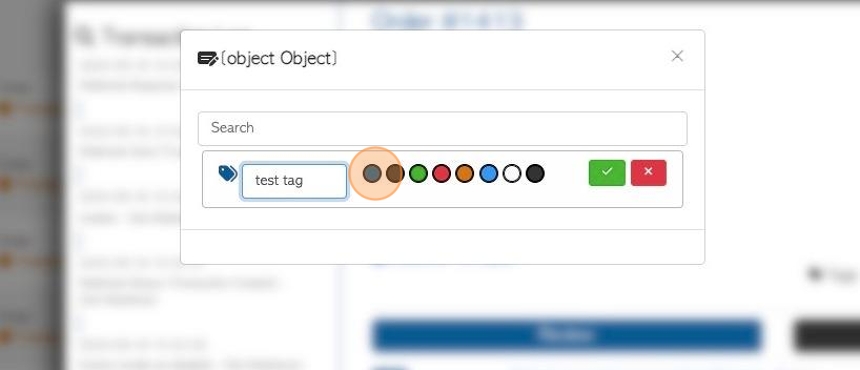
10. Click here to Save.
11. Multiple Tags can be added.
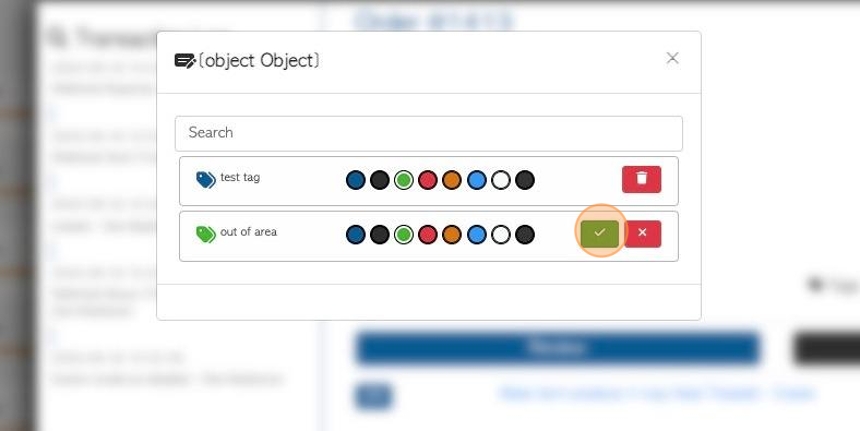
12. The Tags will now show up on the drop down list and can be assigned to transactions.