To set up Pallet Connect for your company, the initial step is to create customer profiles. This can be done either manually or through bulk importing using a CSV file. In the following sections, we will explain both methods in detail.
Manual Entry
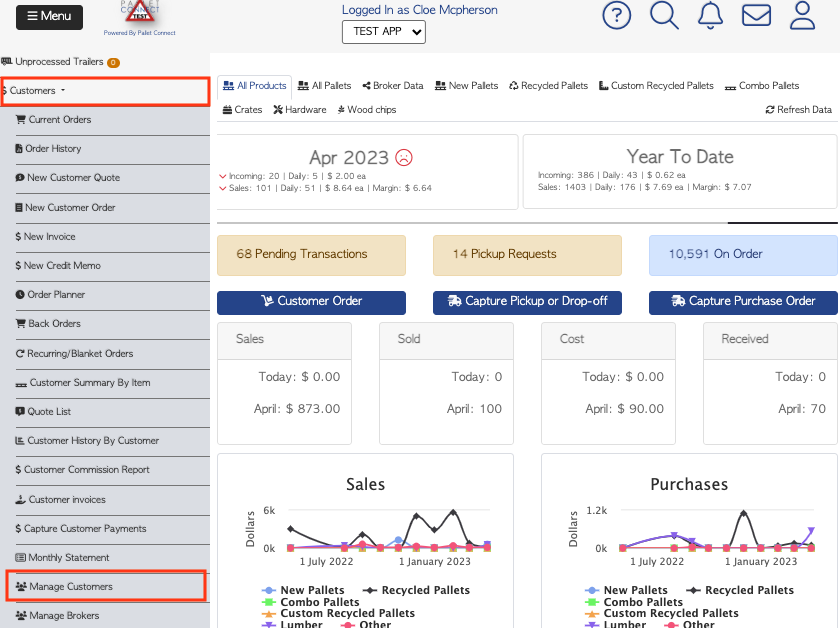
To add a customer to Pallet Connect, start by accessing the "Customers" option from the left-hand menu in your dashboard. Once you're there, scroll down until you find the "Manage Customers" button and click on it.
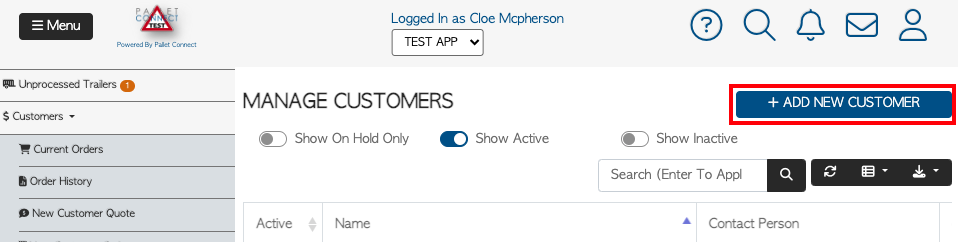
After entering the Customer Manager, locate the "+ADD NEW CUSTOMER" action button in the upper right corner and click on it.
The Contact Details screen will be displayed, where you will be able to make necessary modifications and updates to your customers' information.
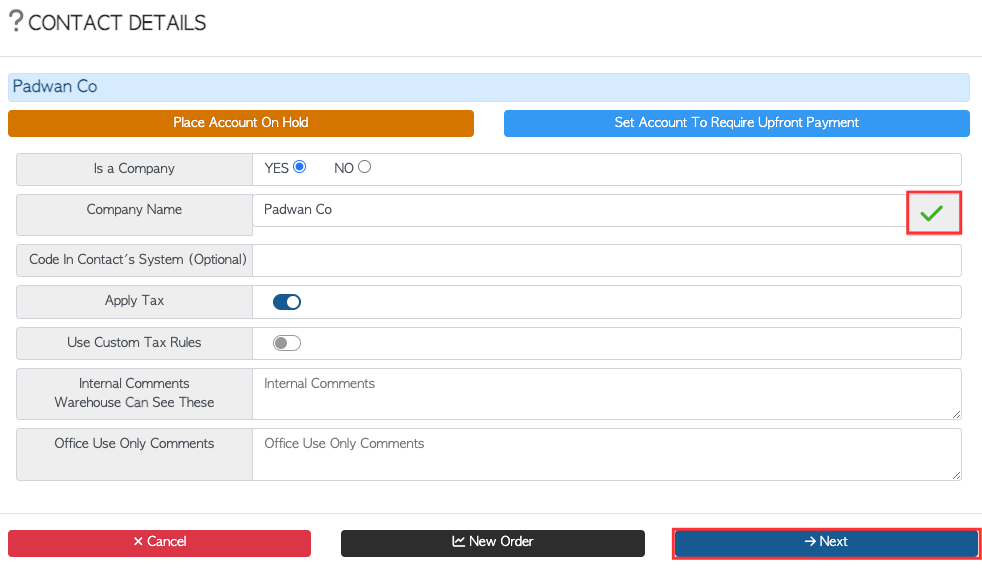
- Company name: This field is mandatory and requires the name of your customer in order to proceed. A green checkmark will appear to indicate that the customer is new, helping to avoid duplicates. If the customer already exists in your account, you will not be able to save it again.
- Code in Contact's System: This field is optional and only necessary if your accounting system requires a specific tracking code for your customer. You may leave this field blank if it does not apply.
- Internal Comments: These comments are made by the warehouse and are visible to both the office and warehouse staff. (optional field)
- Office Use Only Comments: These comments are only visible to the office and cannot be seen by the warehouse. (optional field)
After completing the required fields, click "Next" to continue filling in your customer's details.
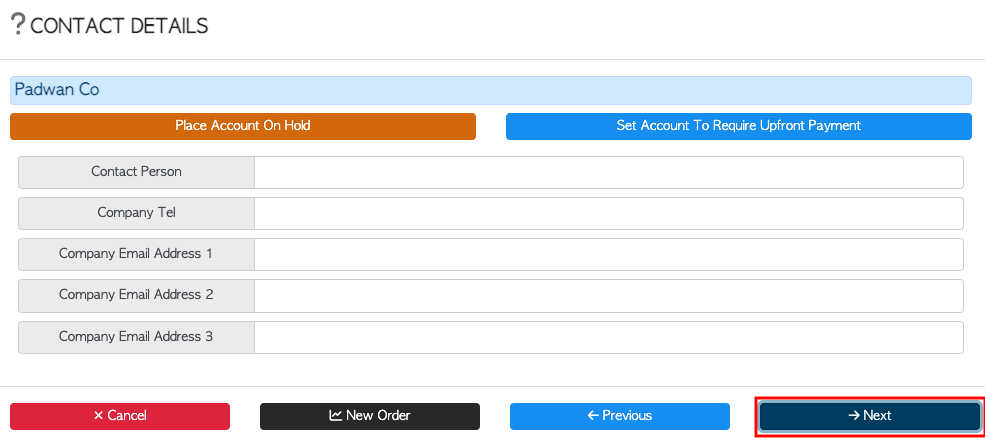
- Contact Person: This refers to the person within the company with whom you typically communicate. (optional field)
- Company Telephone: This field requires the phone number of the company. (optional field)
- Company Email Address: You may include up to three different email addresses for the company. (optional field)
After completing the required fields, click "Next" to continue filling in your customer's details.
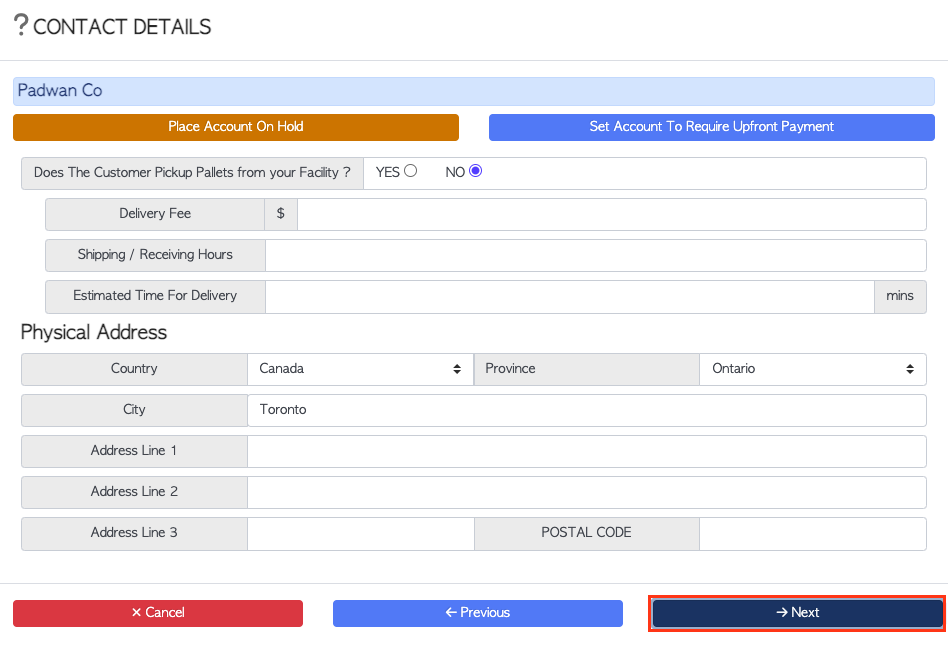
- Does the customer pick up pallets from your facility? Select the option that best describes your customer's preference.
- Delivery Fee: If you deliver and charge a fee, specify it in this field. (optional field)
- Shipping and Receiving Hours: Indicate your customer's preferred time for delivery. (optional field)
- Estimated Delivery Time: Specify the estimated delivery time, as it will be helpful when assigning deliveries to your drivers. (optional field)
- Address: Please specify the country, state/province, city, address line, and zip code for the delivery address.
Once you have completed the required fields, click on "Next" to proceed to fill in your customer's invoicing and payment terms details.
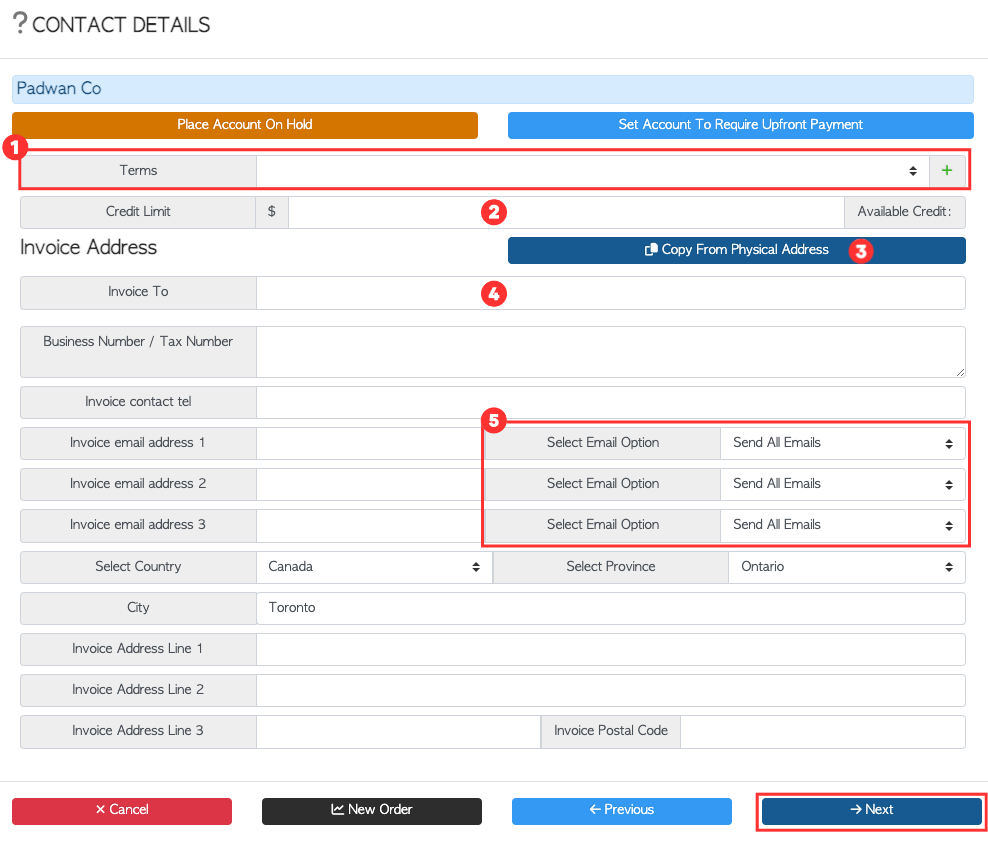
- Payment terms. Choose from one of the predefined payment terms by clicking the drop-down menu. Alternatively, you can create your own payment terms by clicking on the green "+" symbol beside the drop-down menu. (optional field)
- Credit Limit: You may also choose to set a credit limit for your customer (optional field).
- If the delivery address and invoicing address are the same, click the blue button to copy the physical address.
- Invoice to: Enter the name that you want to display on the invoice. Please note that this name may differ from the customer name you previously set up, as you may refer to each customer by a different name. If the names are the same, you can leave this field blank.
- You can enter up to three email addresses where you want to send the invoices. Then, using the drop-down menus, you can choose whether to send all emails, invoices only or proof of delivery only (POD).
When you're finished, click "Next" to proceed to the final step of setting up your customer profile.
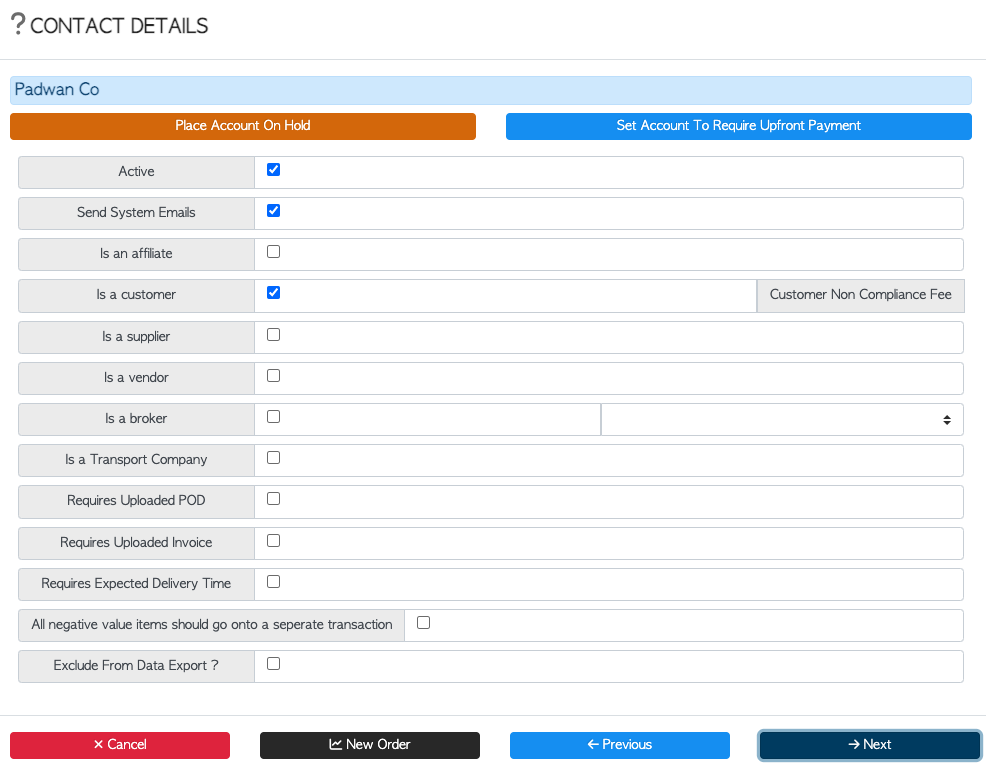
Toggle the desired characteristics on or off. Once you have made your selections, click the "Save" button to save the customer profile.
Bulk import
To import your customers' details in bulk, you will need to use a CSV file that matches our formatting requirements. If you didn't receive the file during your onboarding initial email, you can download it from your Pallet Connect.
To access the file, go to the left-side menu and click on the "Settings" submenu. Then, select the "Import Data" option. Once you are on the file uploader page, click on the question mark icon and a list of available sample files will be displayed.
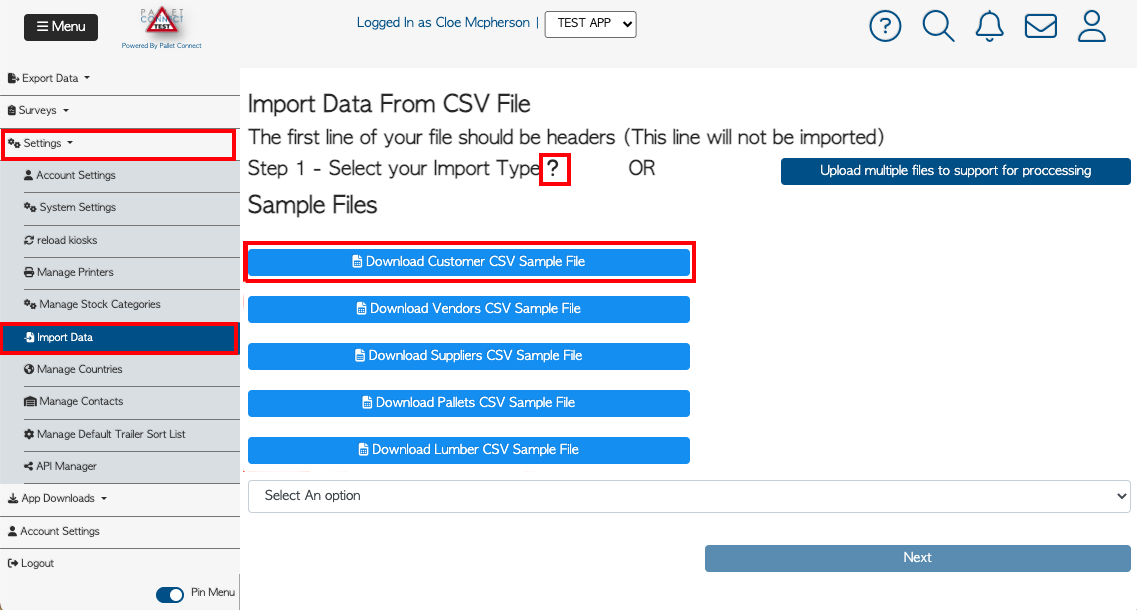
To download the file, simply click on the button named "Download Customer CSV Sample File". Once the file has been downloaded, you can format your customers' information using the provided examples within the document.
We highly recommend cleaning your data during this step. By cleaning, we suggest updating outdated information and removing inactive customers. This will enable you to have only relevant data in your system, prevent clutter, and save time when formatting the files.
Here's a preview of the file:
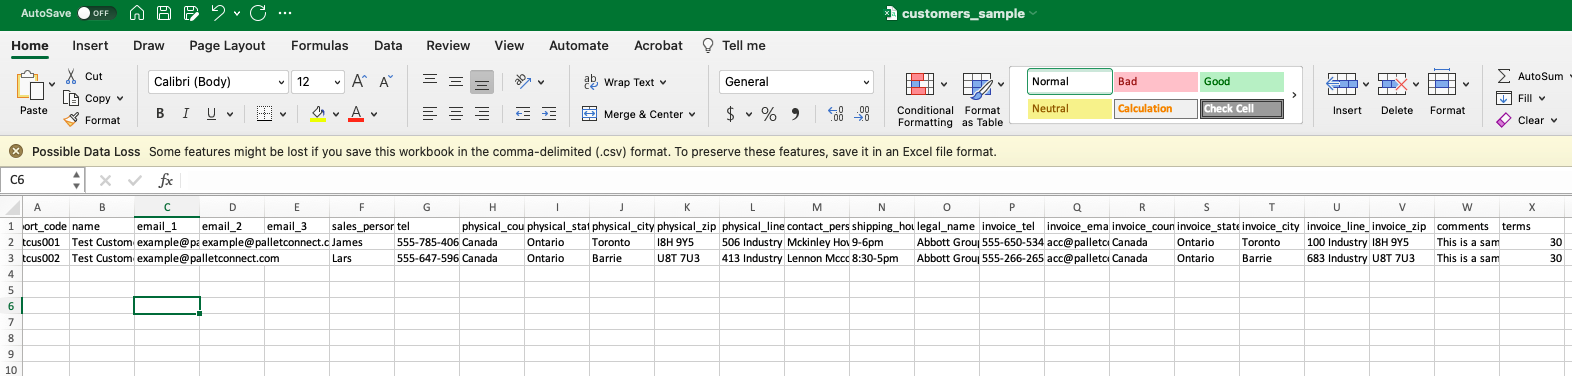
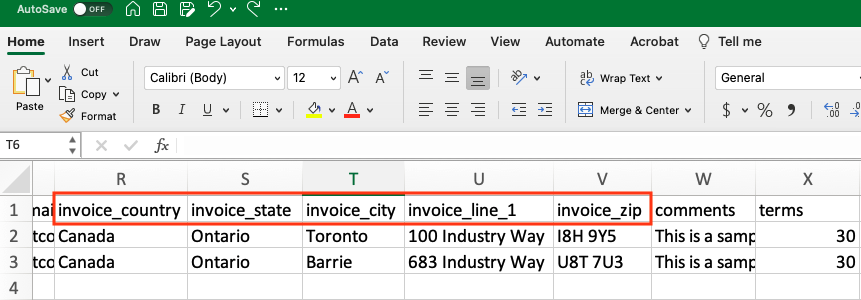
To ensure proper formatting, each piece of required information should be placed in a separate column. For example, the address portion should be split into columns for the address line, city, state, postal code, and country. Please refer to the zoom-in file below for a closer look.
To save the file as a .CSV file, click on "File" and select the "Save As" option. When the pop-up window appears, select the desired folder to save the file and choose the file format as "Comma Separated Values (.csv)." Click "Save"

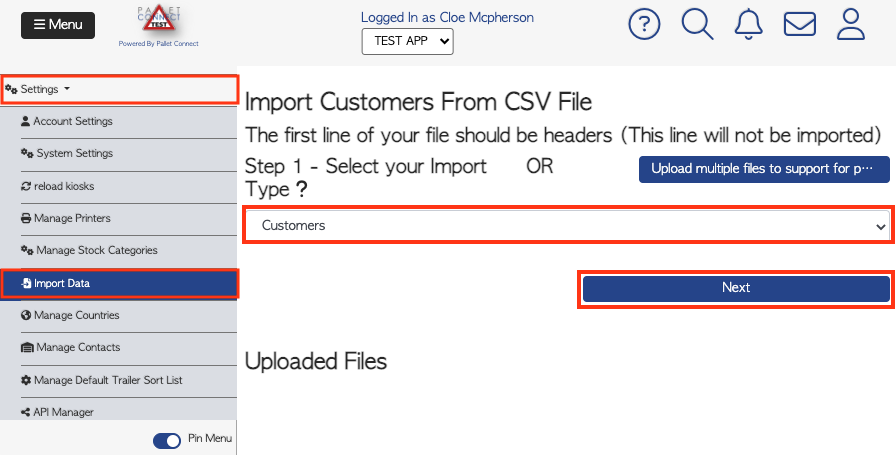
After saving the file, navigate to the Pallet Connect platform and click on "Settings." Select the option "Import Data." In the file uploader, select "Customers" from the drop-down menu and click "Next."
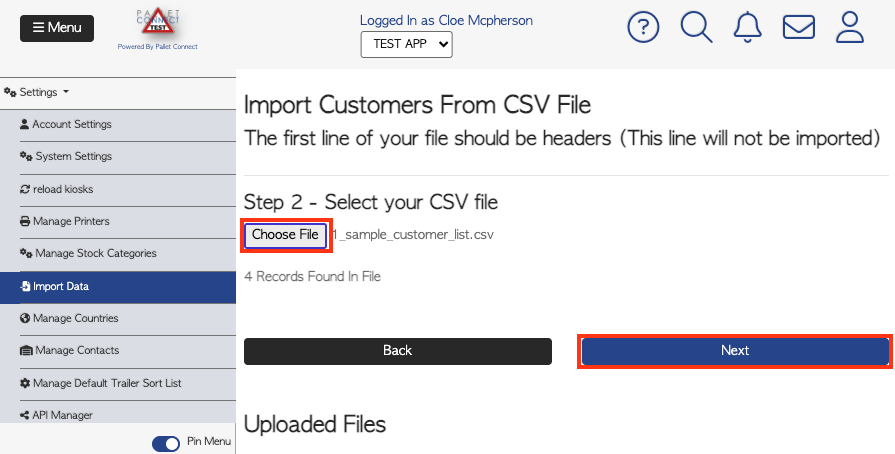
To upload the file, click on the gray button labelled "Choose File" to search for the previously created file. Once you have selected the file, click "Next" to proceed.
Next, you will need to map the details of your file with the corresponding aspects of Pallet Connect. To map an element from Pallet Connect to the file, click on the drop-down menu located in the center column (highlighted in green) and select the option that best corresponds to the element in the left column (highlighted in red).
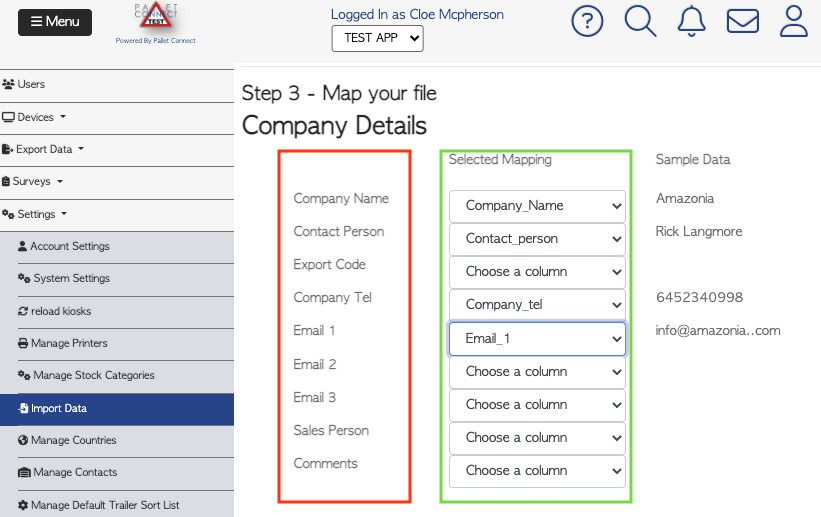
If you notice a drop-down menu that reads "Choose a column," it means that the corresponding aspect of Pallet Connect has not been mapped correctly with the data in your file.
Once you've ensured that all the fields are mapped correctly, click on the "Next" button located at the bottom of the screen, followed by "Start." The system will confirm one last time whether you want to proceed with the import. Click "Yes" to run the import and import all of your customers' information.