1. The shift schedule is used to notify the system of the hours that employees are scheduled to work.
TIP! The shift schedule can be useful when configuring settings in the employee time-clock and for production scheduling.

2. To reach the schedule, navigate to the Main Menu. Click "Employees"

3. Click "Shift Schedule"

4. Click on the "today" button to view the present day calendar. Click the arrows next to the button, to scroll through the calendar.
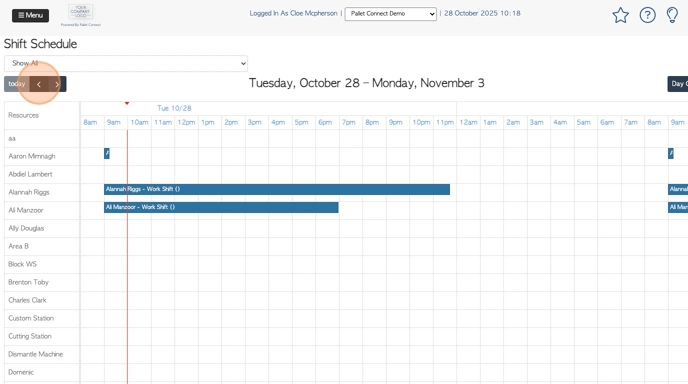
5. The default view is "Schedule". Schedule allows the user to scroll through 1 week of the Shift Schedule.
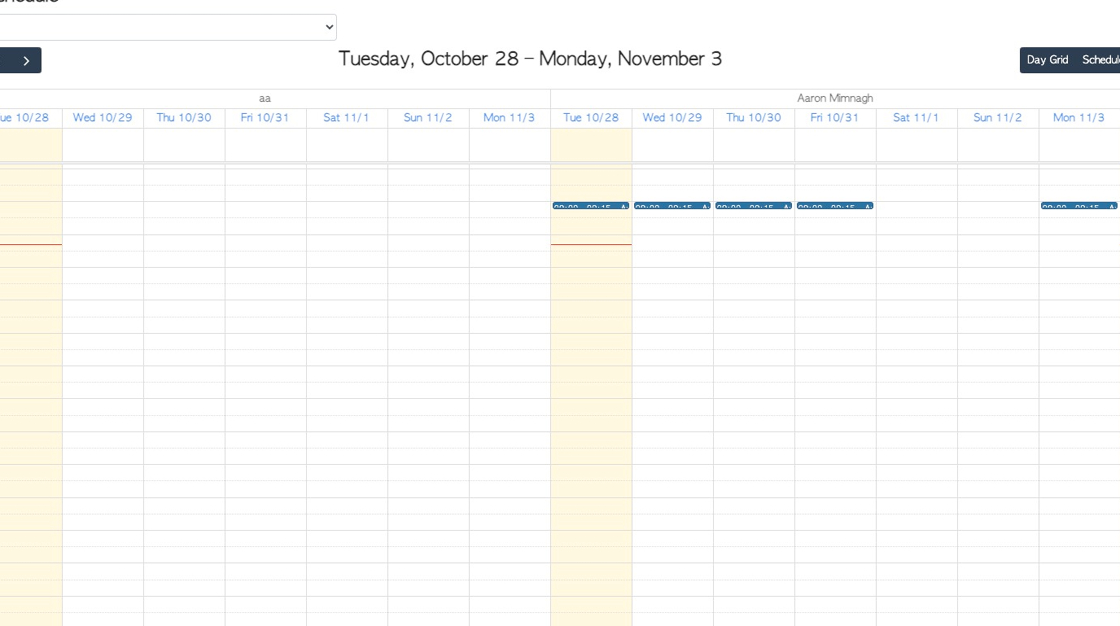
Click "Day Grid" to change the screen view.

6. The schedule now shows a table view for one day only.

7. Click "7 Days" to change the screen to the third view option.

8. The schedule now shows in table form, over one week of the schedule.
9. The default view shows the shifts for all employee departments.
To filter the schedule, Select this drop down menu and pick the selected department. e.g. "Drivers". Now, only drivers will appear on the schedule view.

10. To add a shift, click on the start time on the calendar, corresponding to the selected employee. Hold down the mouse button and drag across to reach the end time.

11. The "Schedule Work Shift" screen will automatically appear.
The time and date of the shift will be shown.

12. This shift can be repeated by clicking on the days of the week.
For example, click the "Mon" field and this shift will be repeated every Monday.

13. To repeat this shift five days a week. Click "Select Week Days"
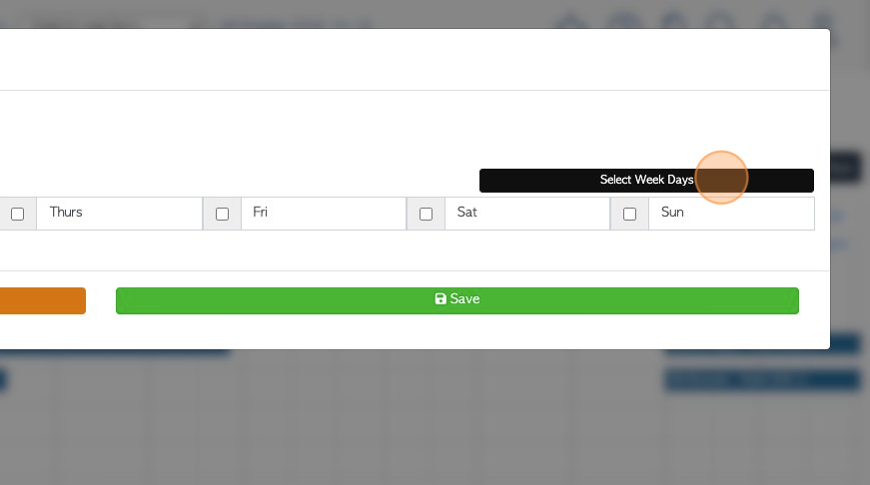
14. This will automatically check off Monday to Friday.

15. Click "Save" when complete.

16. The shift will now appear on the schedule.

17. The shift cannot be edited but it can be deleted, if needed. Simply click on the shift from the calendar.
Choose to cancel the selected shift only, or delete all of the future repeated shifts also.
