Quickbooks: Configuring Export Options For Stock Items
This article explains how to set up stock items to export correctly to the Quickbooks accounting system. There are set-up options at the stock category and stock item level.
1. Stock categories are mapped during the initial mapping process from the Export Data page. The active categories are displayed and they are mapped to the existing accounts in Quickbooks. See related article on mapping.
SET UP FROM STOCK CATEGORY: Select "Stock" from sidebar menu.
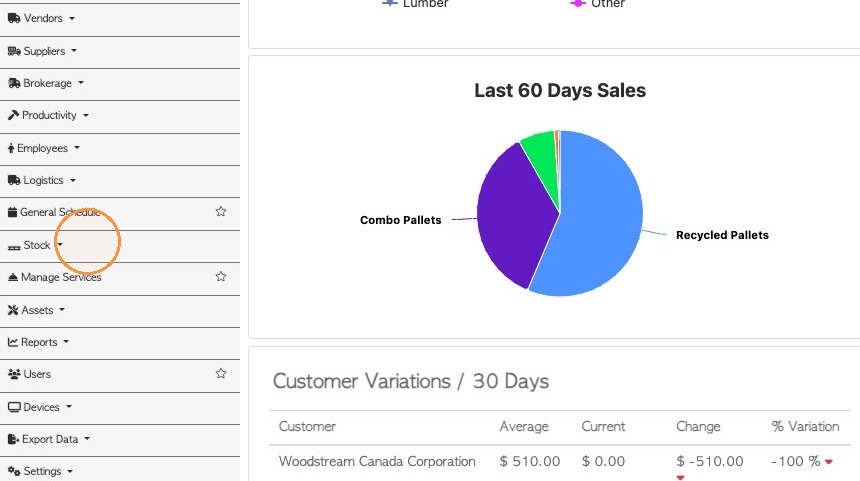
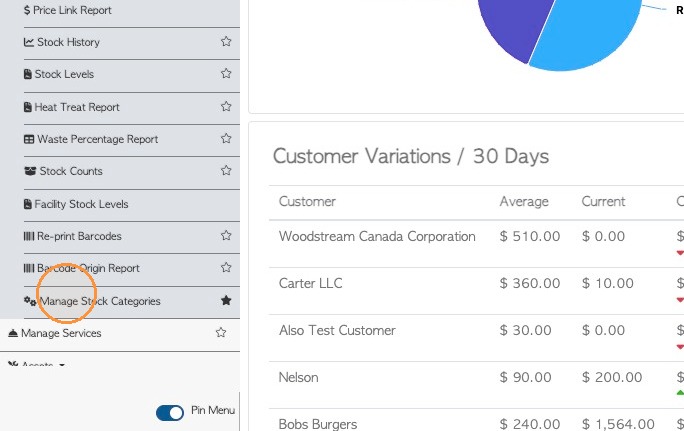
2. Click on "Manage Stock Categories"
3. Select a category e.g. "New Pallets".
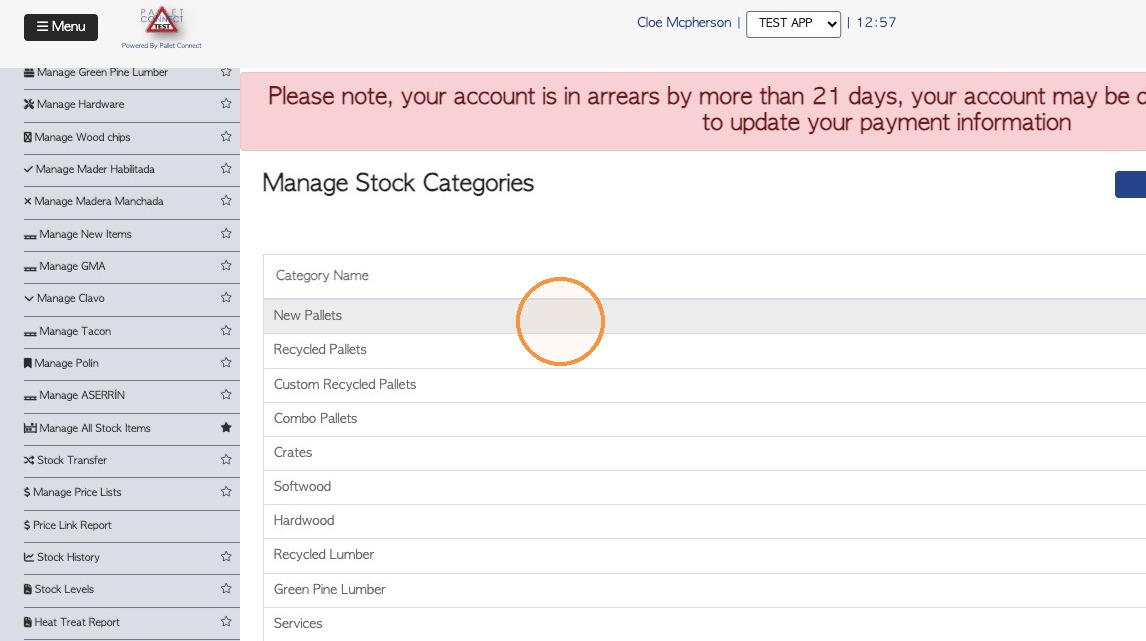
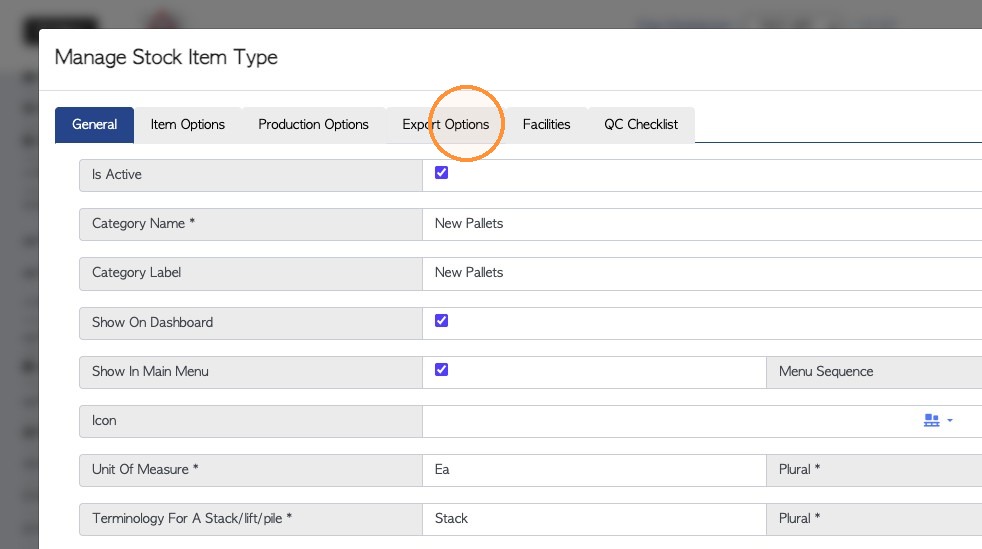
4. Click on the "Export Options" tab.
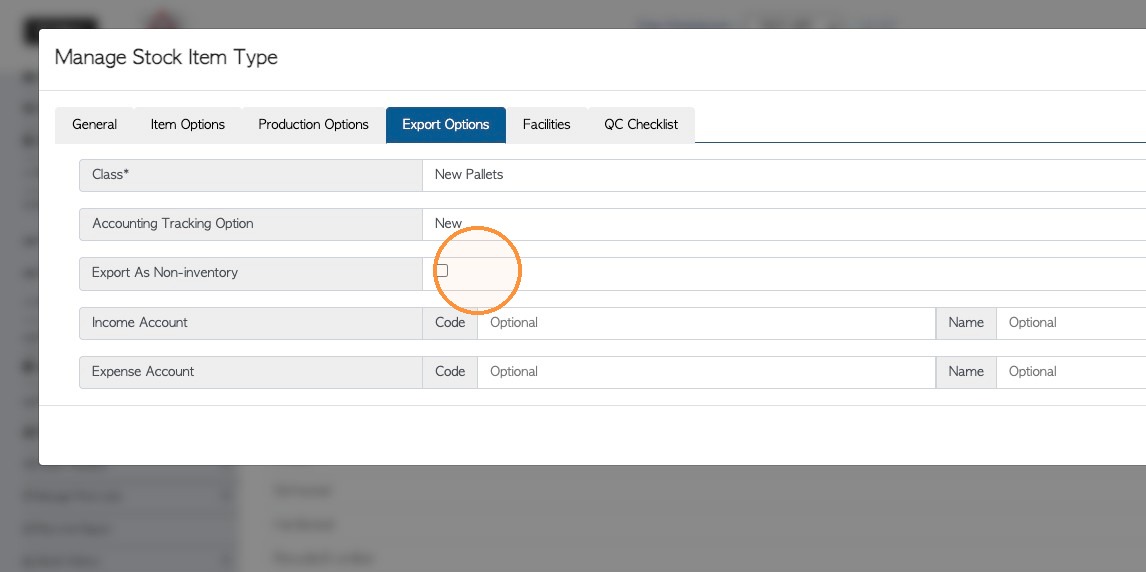
5. Except for "services", categories are automatically exported as 'inventory'. To send items of a category to Quickbooks as non-inventory; enable 'Export As Non-Inventory'.
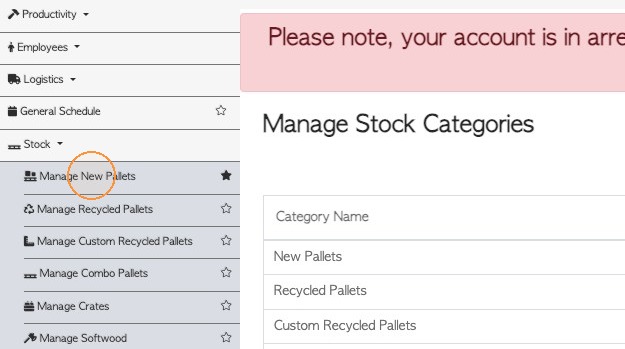
6. FROM STOCK ITEM PROFILE: To navigate to the stock item, click on the selected category from the Stock section of the menu. e.g. "Manage New Pallets"
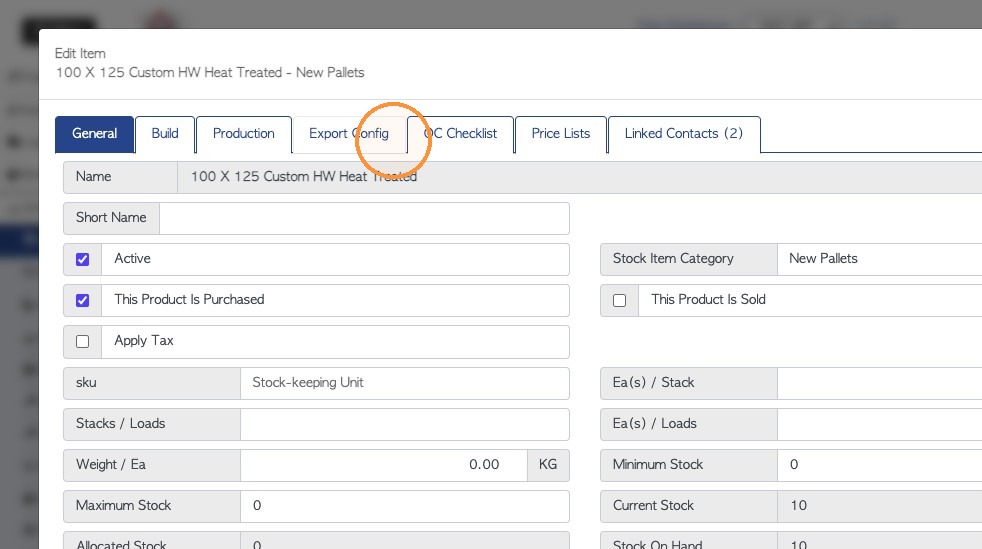
7. Navigate to "Export Config" tab from within the profile.
8. During export Pallet Connect looks to send a stock item to the exact matching name in Quickbooks. If the item is not found, then a new item is created. This will then show up in the "Product/Service" column of the invoice in Quickbooks and the full name (including stock category) will display in the 'description' column.
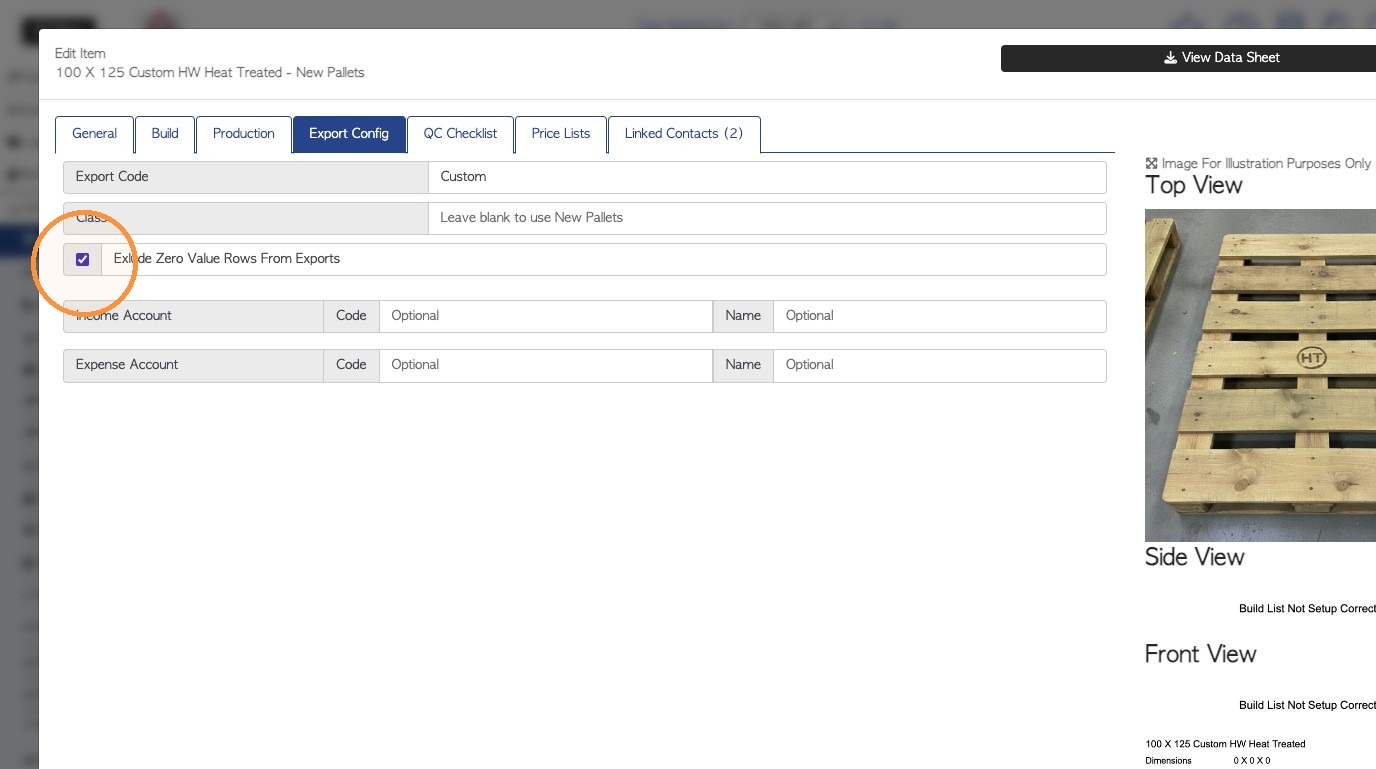
If the item name is different in Quickbooks, then an export code can be added. This will be used during export, instead of the Pallet Connect item name. The export code will be displayed in the "Product/Service" column in Quickbooks.
In the example below. "100 x 125 custom Hw Heat Treated" is the name in Pallet Connect but "Custom" will show up in Quickbooks, as it is the export code.
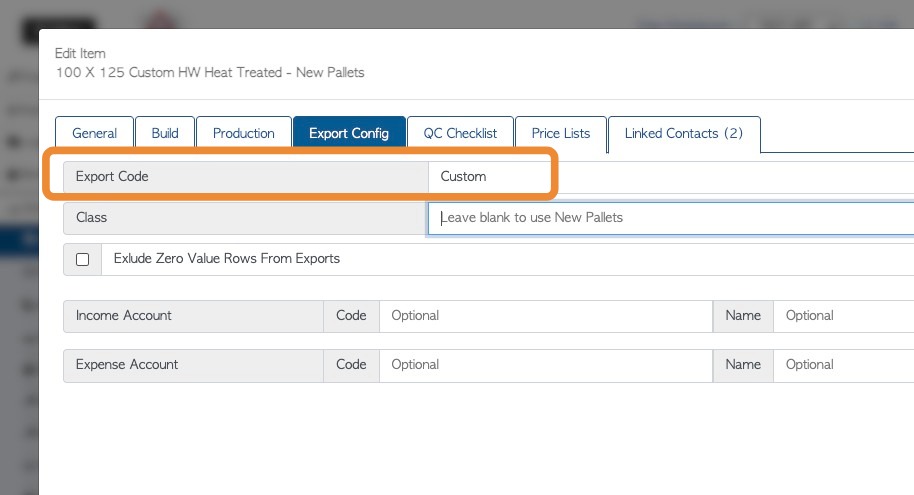
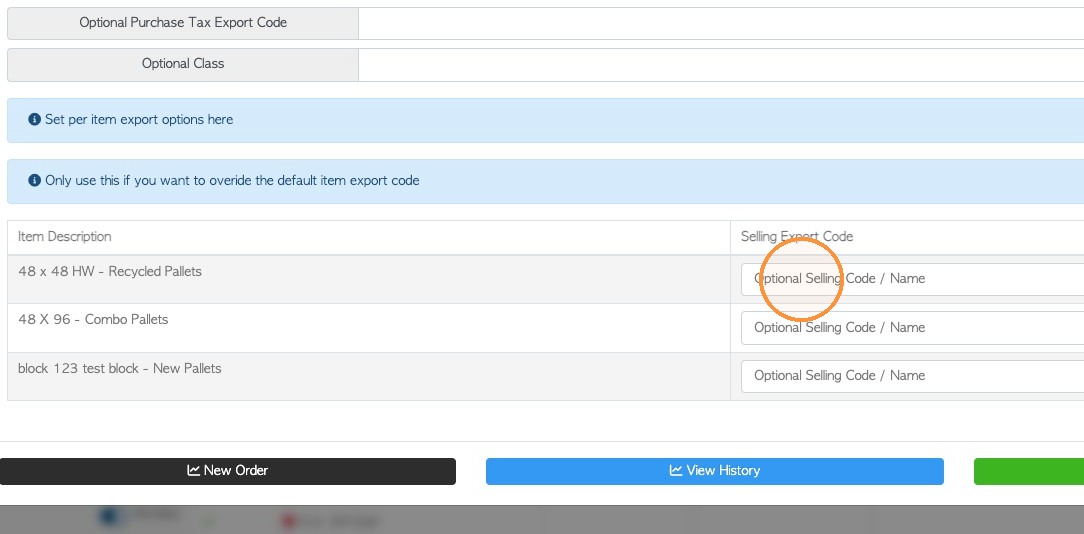
9. FROM LINKED STOCK ITEM: If an item is linked to a Customer, an export code can be added. This is only used when this item is sold to this Customer, and will override any other export codes for this item.
Firstly, ensure that the Customer has "Linked Stock Items" as these will show up in the Export tab.
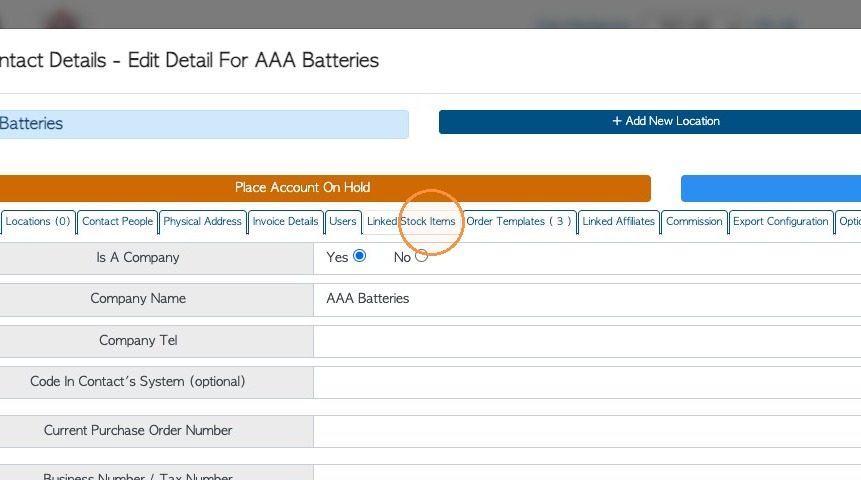
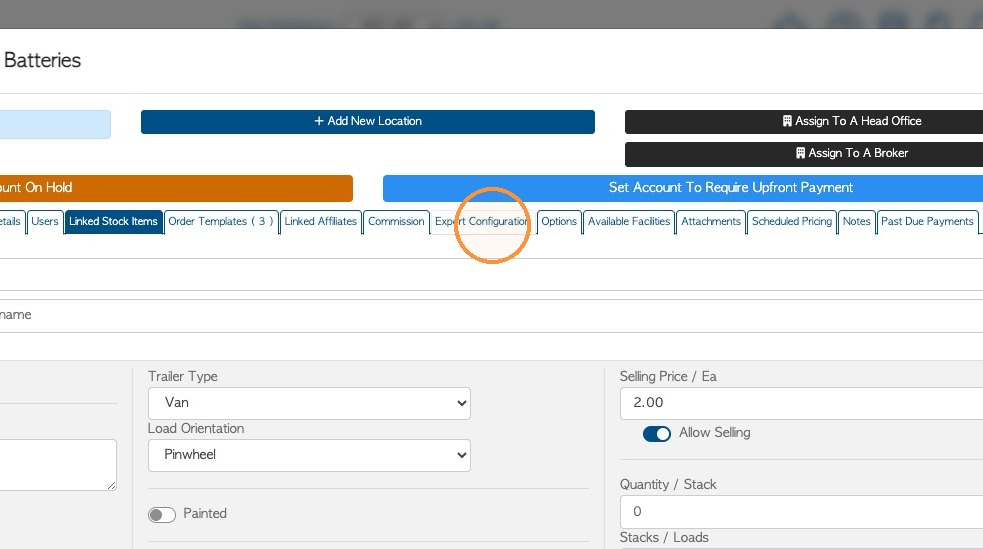
10. Click "Export Configuration"
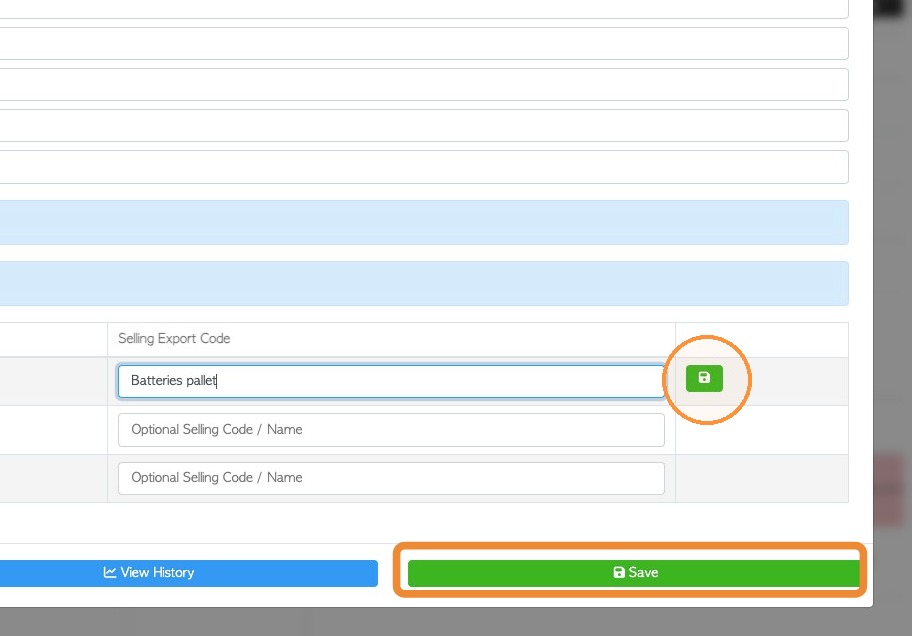
11. Click the "Optional Selling Code / Name" field, to enter the export code. This is carried out per item.
12. Click save on the item and also 'save' before closing the profile.
13. NOTE: To only export items with a quantity, enable "Exclude Zero Value Rows From Exports" checkbox.