1. When ordering hardware e.g nails, they are usually purchased by the box/container but need to be used individually in production.
This article show how to set up a hardware item to be purchased per box/container.
TIP! See related article on how to use nails/hardware in production, to keep an accurate record of stock levels.
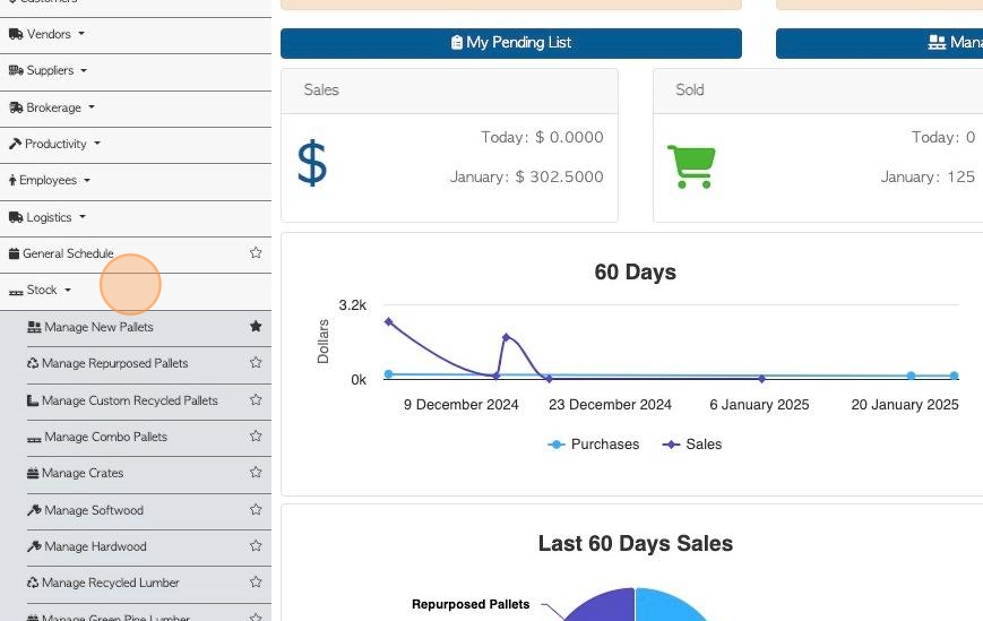
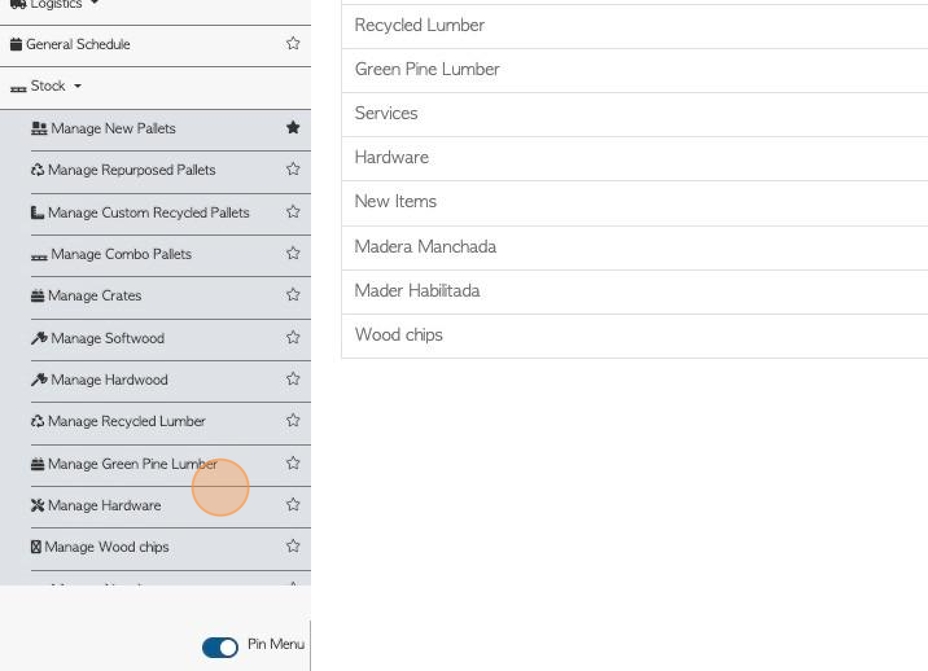
2. Navigate to the main menu. Click "Stock"
3. Pallet Connect sites have a default "Hardware" Category, the name can be changed if preferred e.g. Nails, Fasteners etc.
To change properties of the "Hardware" category, click "Manage Stock Categories"
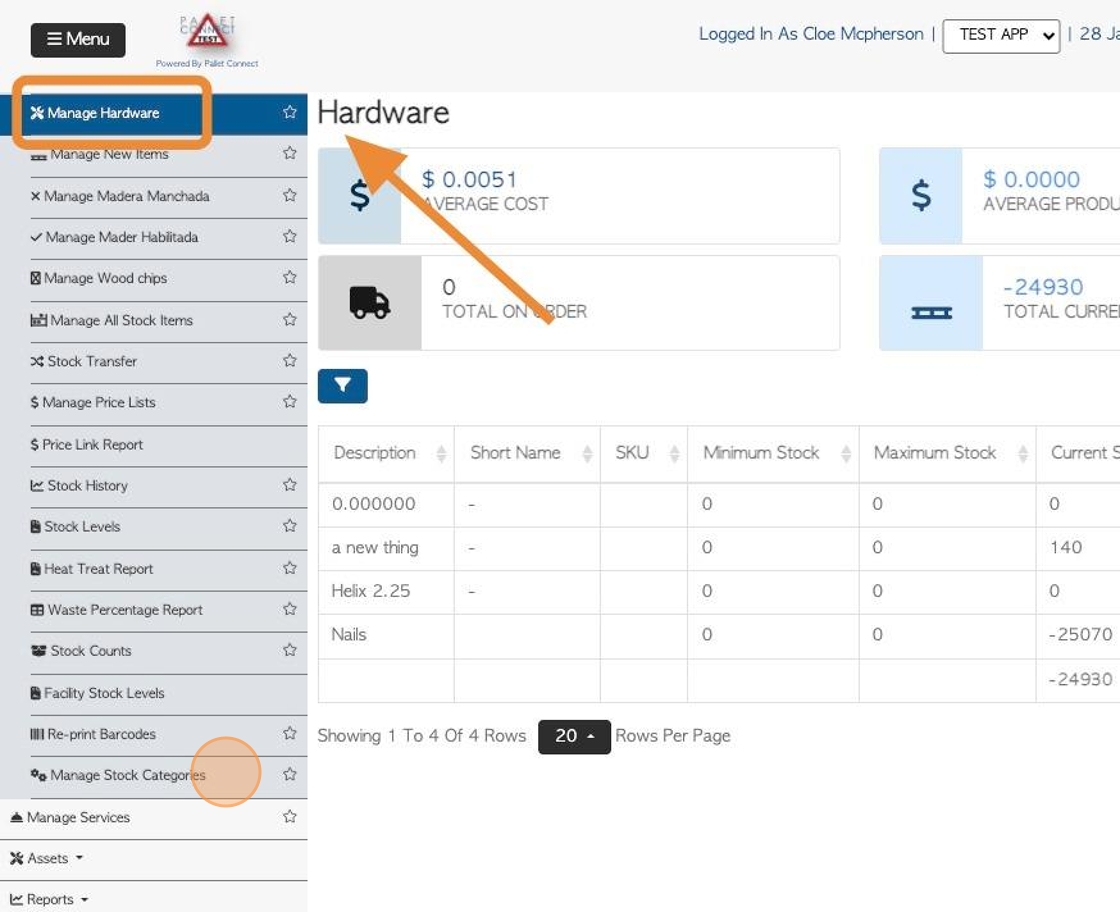
4. Click on the "Hardware" category from the list, to reach the profile.
Click this text field to change the name of the category.
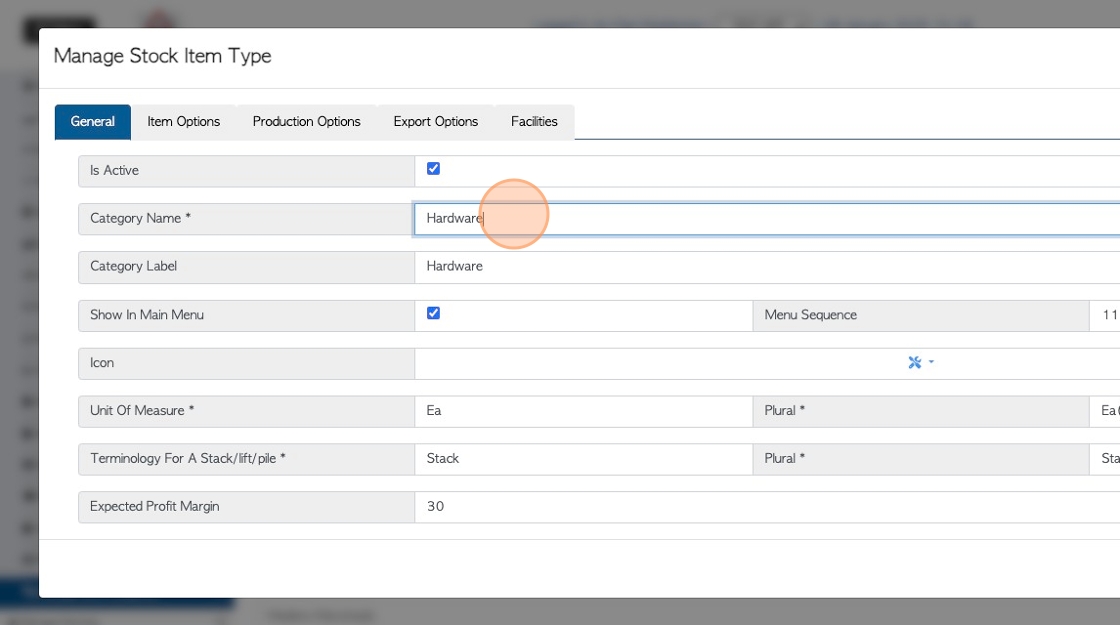
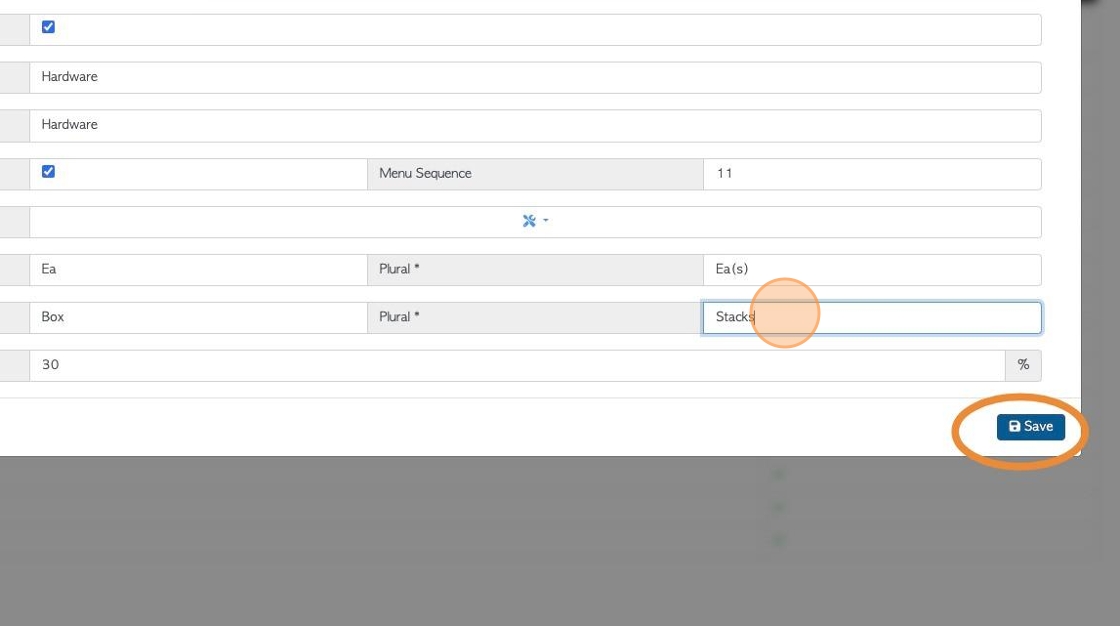
5. Click this text field to change the name of the container type, for purchase e.g. "box".

6. Click this text field to match the container name in plural e.g "Boxes".
Click "Save" to complete.
7. Click on the Hardware category to update items or add a new stock item.
8. Note that all items in this category will now show the container name chosen e.g. "box".
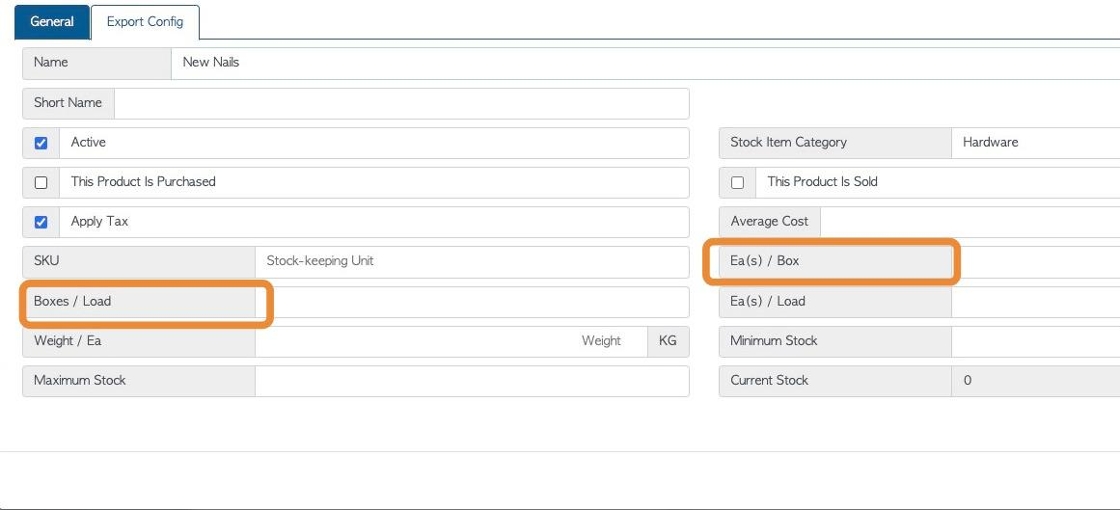
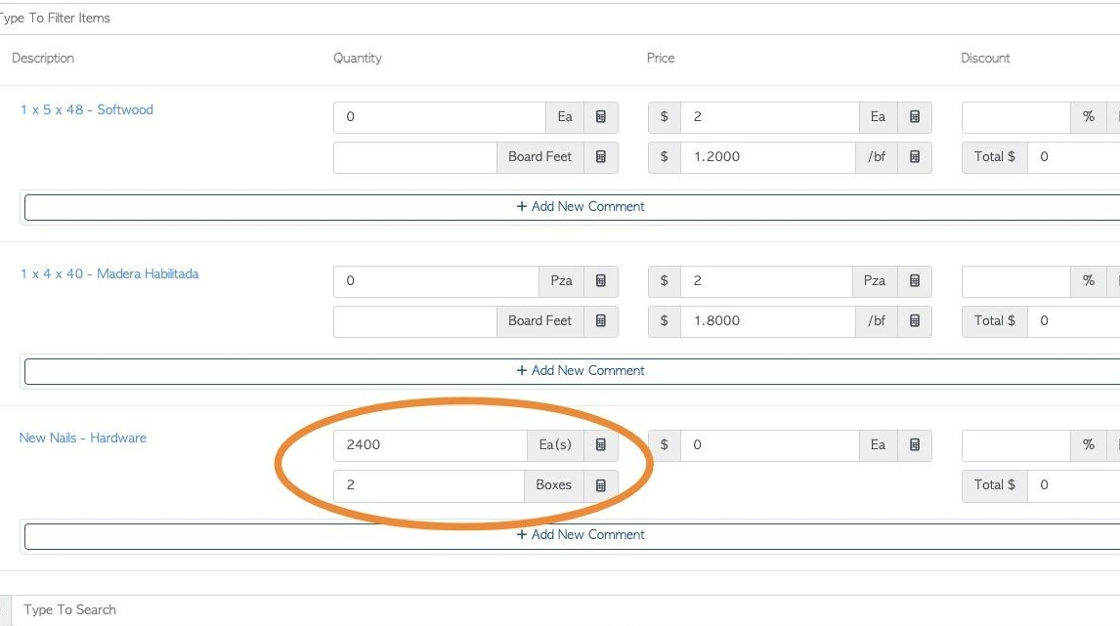
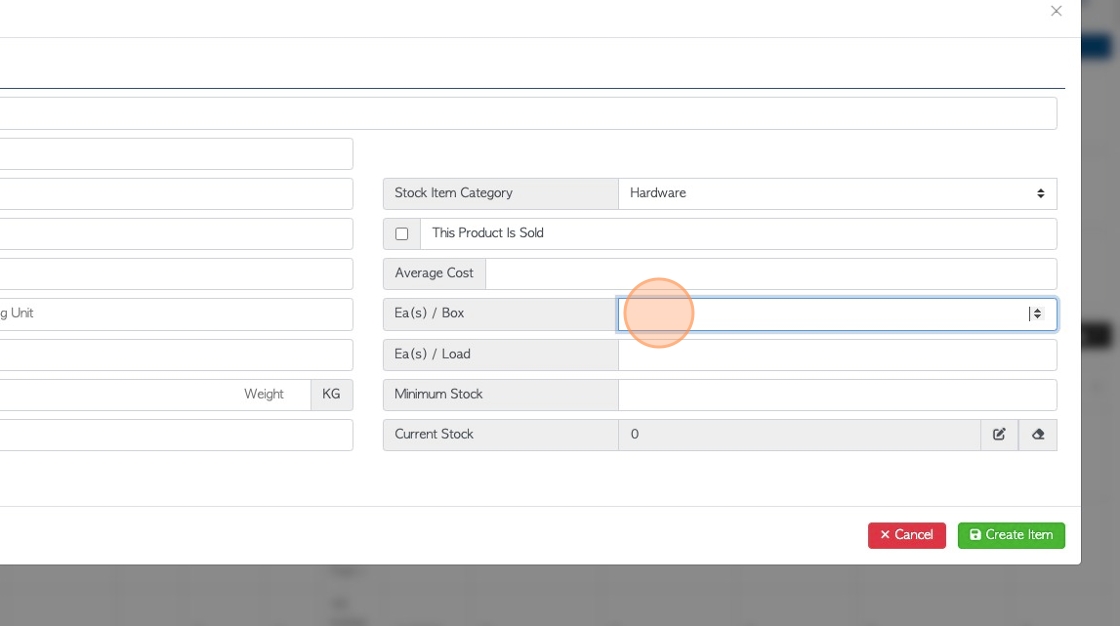
9. Click this number field to add the quantity of item per box.
Click "Save" for existing items, or "Create Item" for new items.
10. Now, when creating a Purchase Order, only the box size needs to be entered into quantity.
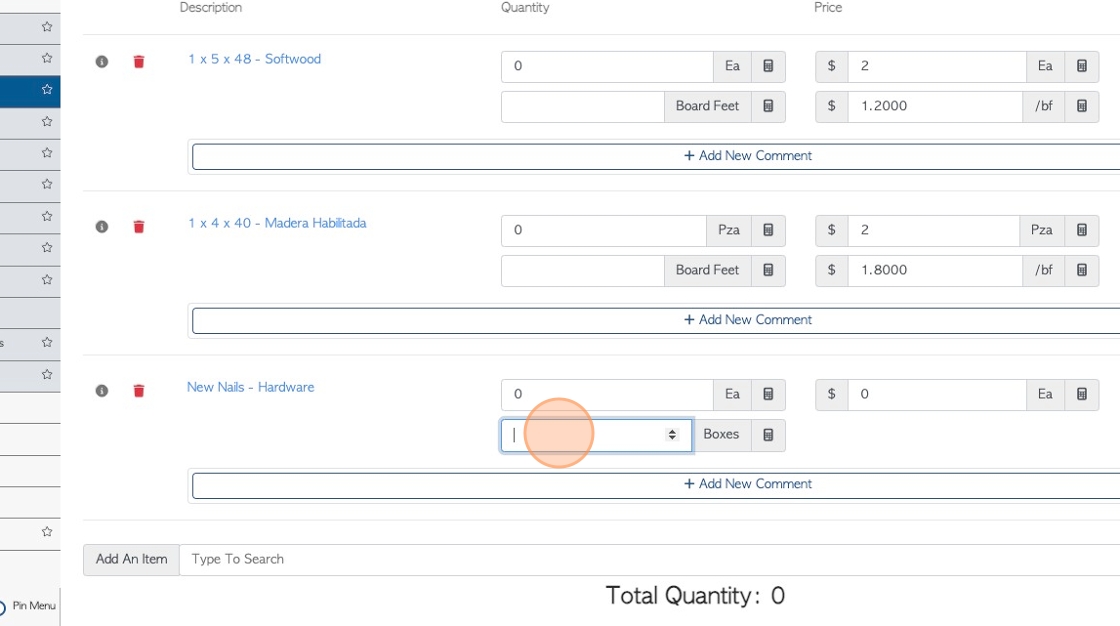
11. The individual quantity will be calculated automatically.
This will be added in the Total Quantity.