To ensure that Pallet Connect accurately reflects the categories in your inventory, you have the option to create new stock categories or modify existing ones.
TIP! Only a "General Manager" user type can access Stock Categories.
Create a New Stock Category
To access the stock categories management feature in Pallet Connect, first, navigate to the left-hand side menu and click on "Settings," then select "Manage Stock Categories" from the available options. Once the new window appears, you can create a new category by clicking on "Add New Category," located in the upper right corner.

A pop-up window named "Manage Stock Item Type" will appear, where you can fill in the details of the new category. This window consists of various tabs, each representing a different aspect of the category that you can edit. To begin, select the "General" tab.
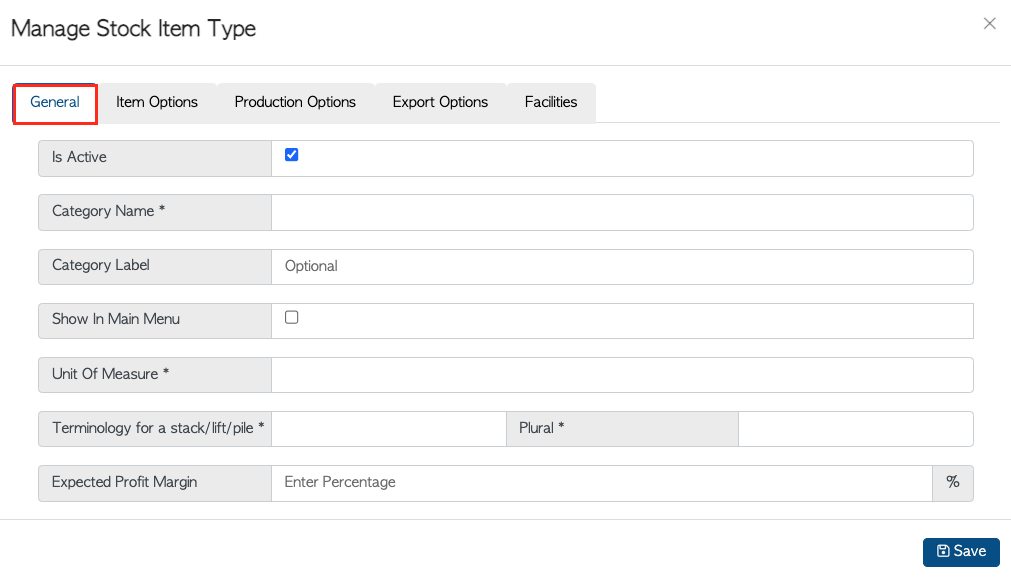
When you are filling out the "General" tab in the "Manage Stock Item Type" window, make sure to provide the following information:
- Category Name: Enter a name that accurately describes the new category (e.g., Wood Chips)
- Category Label:
- Show In Main Menu: Select this option if you want the new category to appear in the Main Menu. Leave it blank if not.
- Unit of Measure: Enter the measurement unit that best suits the products within this category.
- Terminology for stack/lift/pile: Indicate whether the products in this category are referred to as stack, lift, or pile.
- Plural: Enter the plural form of the category name.
- Expected Profit Margin:
After filling in the required information on the "General" tab, click on the "Item Options" tab to proceed.
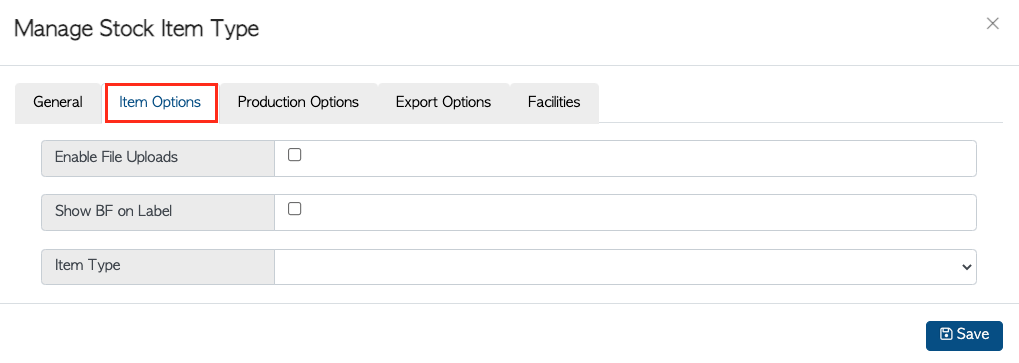
On the "Item Options" tab, you will find the following options:
- Enable File Uploads: Select this option if you want to enable bulk importing data into Pallet Connect. Leave it blank if not.
- Show BF on Label: Select this option if you want to display board feet on the printed labels.
- Item Type: From the drop-down menu, select the category type. You can choose from "Product," "Lumber," "Hardware," or "Service." Depending on your selection, additional options will become available.
- If you select "Is A Product" from the "Item Type" drop-down menu, you can further specify if it's a Pallet, a Crate, or another type of product. Additionally, you can indicate if this category will contain new, recycled, or custom-made products by selecting the corresponding checkmarks.
- If you select "Is Lumber" from the "Item Type" drop-down menu, you can further specify if it's Hardwood or Softwood. Additionally, you can indicate if this category will contain new or recycled lumber.
- If you select "Is Hardware" or "Is A Service" from the "Item Type" drop-down menu, there's no need to add anything else on this tab. If you select "Is A Service," the tab "Production Options" will disappear.
After filling in the required information on the "Item Options" tab, click on the "Production Options" tab to proceed if it's applicable.
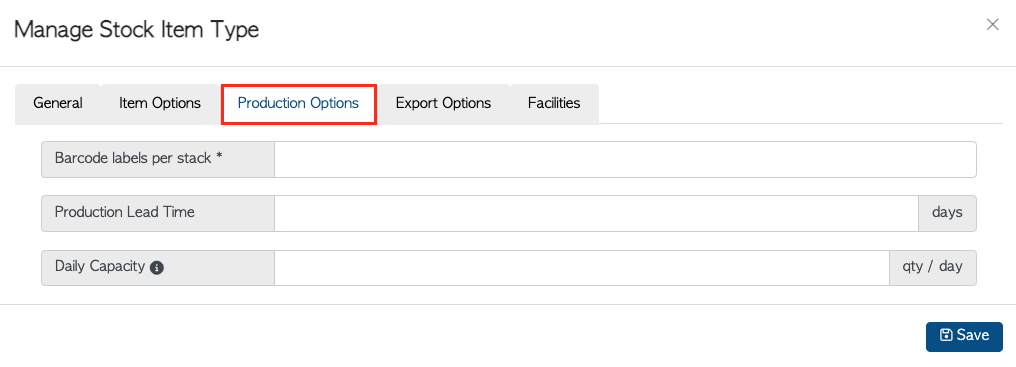 Production Options
- Barcode labels per stack: Specify the number of labels you want to print per stack.
- Production Lead Time: Indicate the amount of time required to manufacture the products in this category, from the moment an order is placed until the items are ready for delivery.
- Daily Capacity: Enter the maximum number of items you can assemble in a single day for the products within this category.
After filling in the required information on the "Production Options" tab, click on the "Export Options" tab to proceed
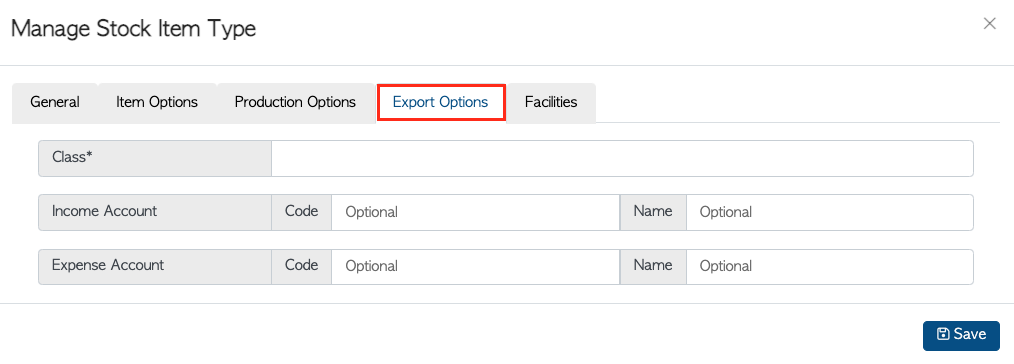
On the "Export Options" tab, you will find all the necessary fields to configure your export settings when transferring reports to your accounting system. Here are the fields you need to fill:
- Class:
- Income Account:
- Expense Account:
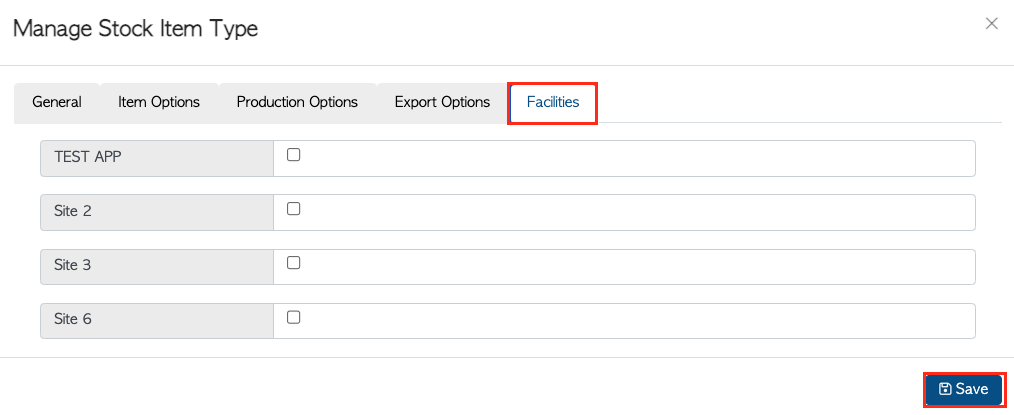
After you have filled in all the required information, you can either click on the "Facilities" tab if you have multiple facilities and want to enable this category in other sites or simply click on "Save" to create the new stock category.
Edit an Existing Stock Category
To make changes to an existing Stock Category, go to the Stock Category Manager and select the category you want to modify from the list.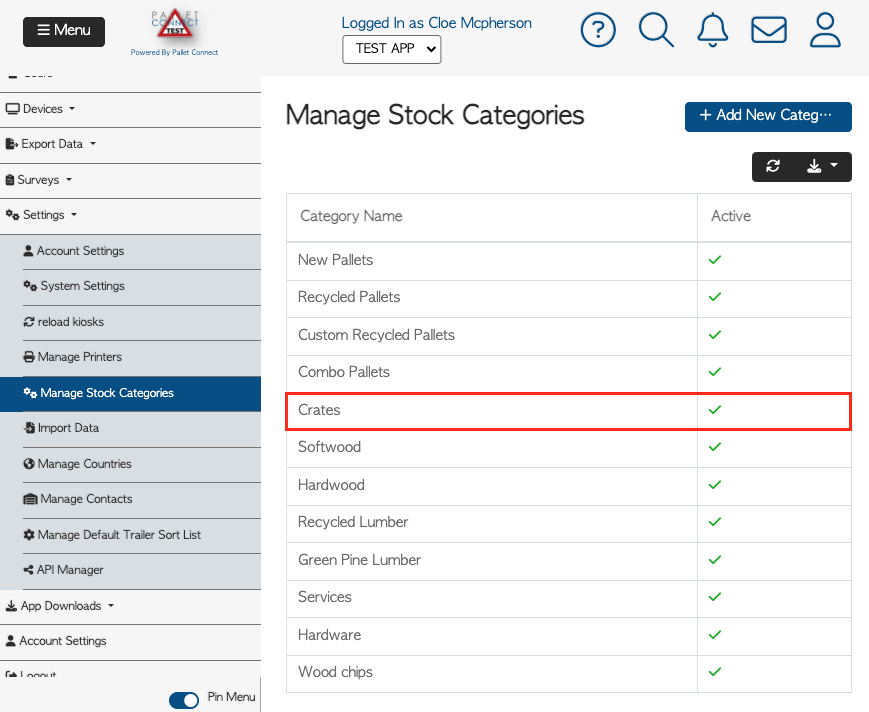
This will open a pop-up window called "Manage Stock Item Type," where you can make any necessary changes to the category details or disable it by deselecting the "Active" checkbox. Once you have finished making changes, click the "Save" button to update the category.