1. The loading schedule is a useful tool to help organize warehouse workers' loading workload.
This article provides an overview of the schedule and how to use it.

2. Navigate to the main menu and click "Logistics".

3. Click "Loading Schedule"

4. Click here, on the 'i' icon, to view the legend.

5. This explains the colour code used to label the transactions at different stages.

6. Click this icon to hide the main menu, click again to restore.

7. Click these buttons to scroll through the dates of the calendar.
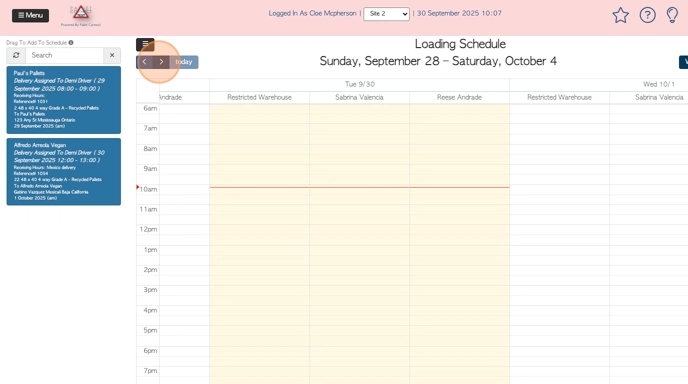
8. The view options are :"Today", "Day", "Week" or "4 Days".

9. Click the "Search" field to search the unscheduled tasks, for a particular customer name or transaction number.

10. To schedule a task, click on the selected transaction from the list and drag and drop it onto the date/time, under the employee name.
TIP! To remove a task, simply drag and drop back onto the unscheduled list.
TIP! The employees on the schedule are "restricted warehouse" users. See related article on how to set up an employee for the loading schedule.

11. Once scheduled, the employee will now see the transaction on the pending list from their log in.

12. Once ready, they will click on the "Start Loading" button.

13. They will enter the trailer number that is being loaded and a dock door number. Click 'save' to complete.

14. This will start the timer to calculate the length of loading time.

15. Once completed they will click "Complete Loading"

16. Click "Loading Completed" to confirm.

17. This completion will automatically update the loading schedule. The colour wil change to indicate this update.
